Watch Quick Video
POS Report
Our full POS Report
module helps organizations manage and streamline retail session reporting directly from the Odoo POS
screen. With the ability to set approval rules and to create documents on demand basis, cashiers and
executives can generate detailed Z-reports, covering group-wise, product-wise, customer-wise and payment
data according to the predefined settings. The application also supports user-specific and worker-specific
access control, offers multiple output formats such as PDF and receipt, and provides past session
reports.
It provides seamless synchronization of POS transactions with live analysis overviews of margin and cost
tracking, thereby making daily retail accounting tasks easier to manage. The application provides clear
transaction records and simplifies general order reporting for a single or multiple sessions, allowing it
to improve business visibility, minimize manual tracking and boost overall auditing efficiency.
POS Report
- Configure user-specific and employee-specific Z-Report generation permissions directly.
- Print automated session and audit reports directly from the Odoo POS screen.
- Generate report layouts in multiple output formats, including PDF, Receipt, or both.
- Display structural breakdown details for category, product, customer, and payment configurations.
- Select and generate aggregate analytical data for multiple historical or posted sessions.
Complete Workflow for Manage POS Report
Activate the POS Report module and configure POS Z-Report Configurations under the Point of Sale settings. Enable specific options like "Allow Posted Session Report", "Display Category Wise Detail", "Display Product Wise Detail", "Display Customer Wise Detail", or "Display Payment Detail" directly for your POS shop. The module automatically displays a dedicated action pop-up on the POS screen and generates comprehensive session reports in real time when cashiers or managers click the Z-Report button, pulling analytical insights like margin and cost overview based on active configurations. It automatically processes and prints related operational layout documents in PDF format, receipt format, or both based on selected preferences. This helps businesses improve operational management, increase retail audit transparency, and simplify session tracking through POS report automation and automated backend document generation.

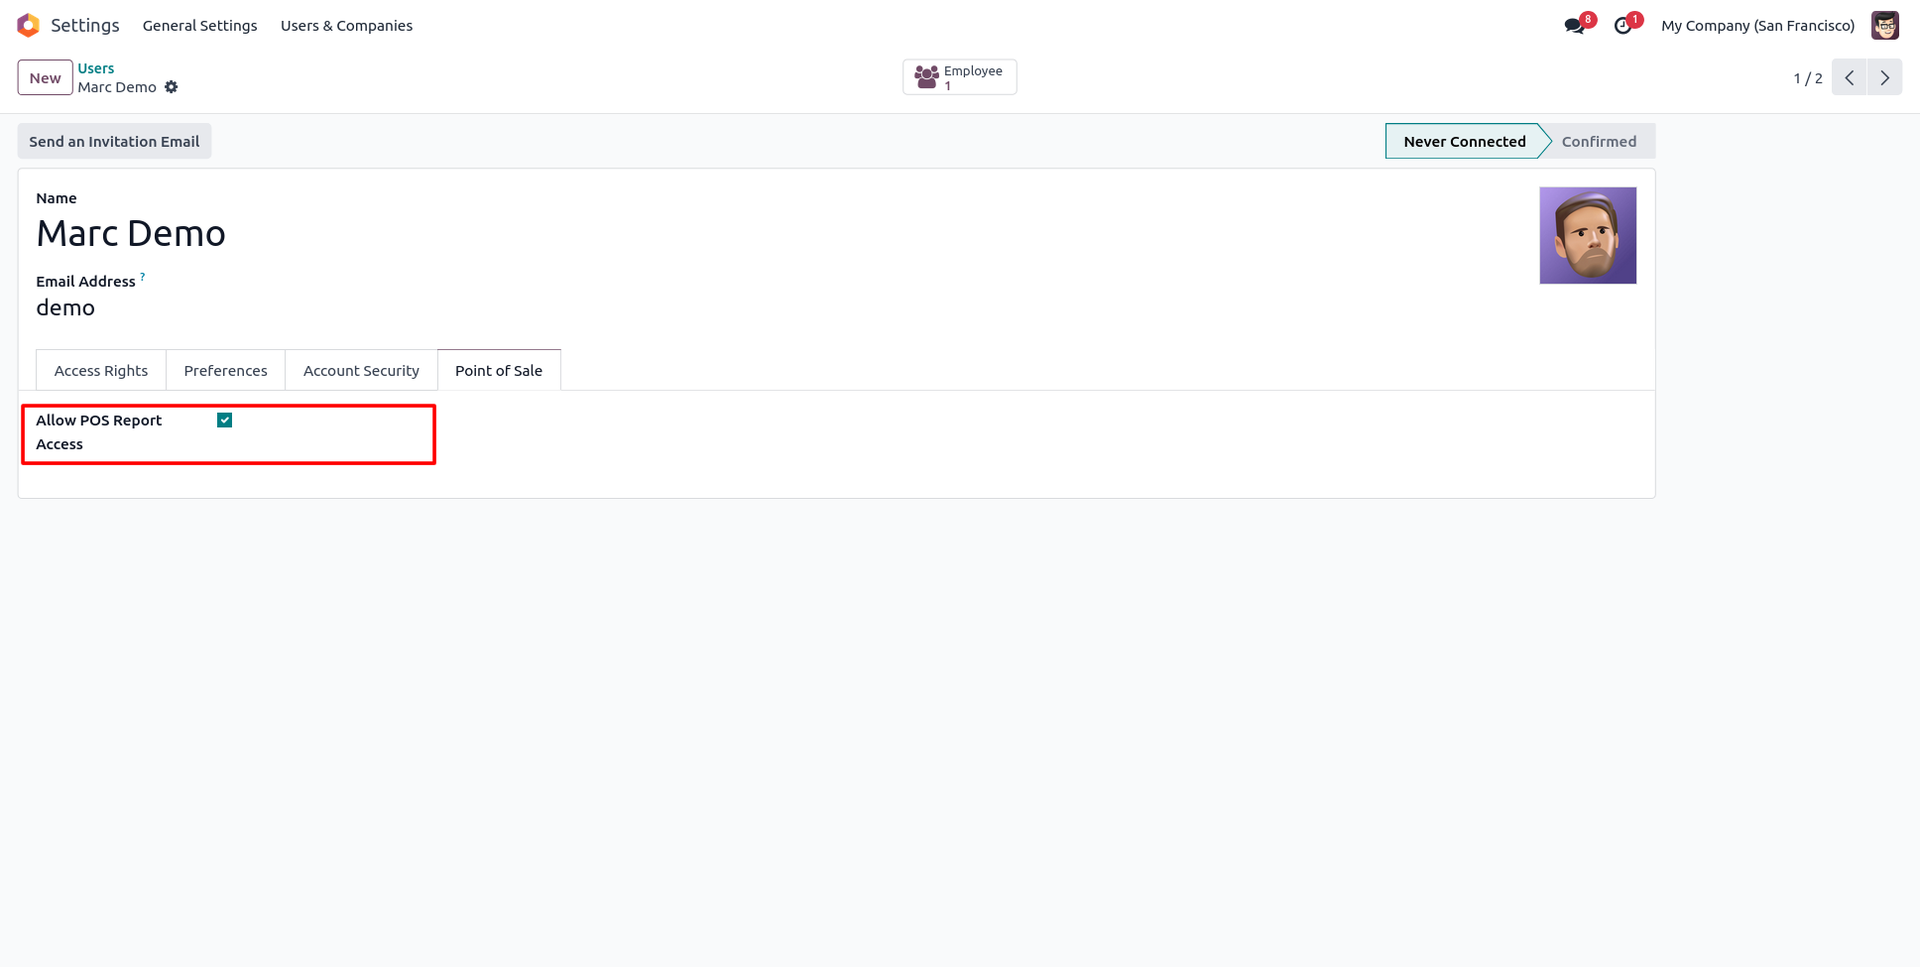
1. Go to user settings and tick "Allow to Generate Z Report" to grant the specific user reporting access.
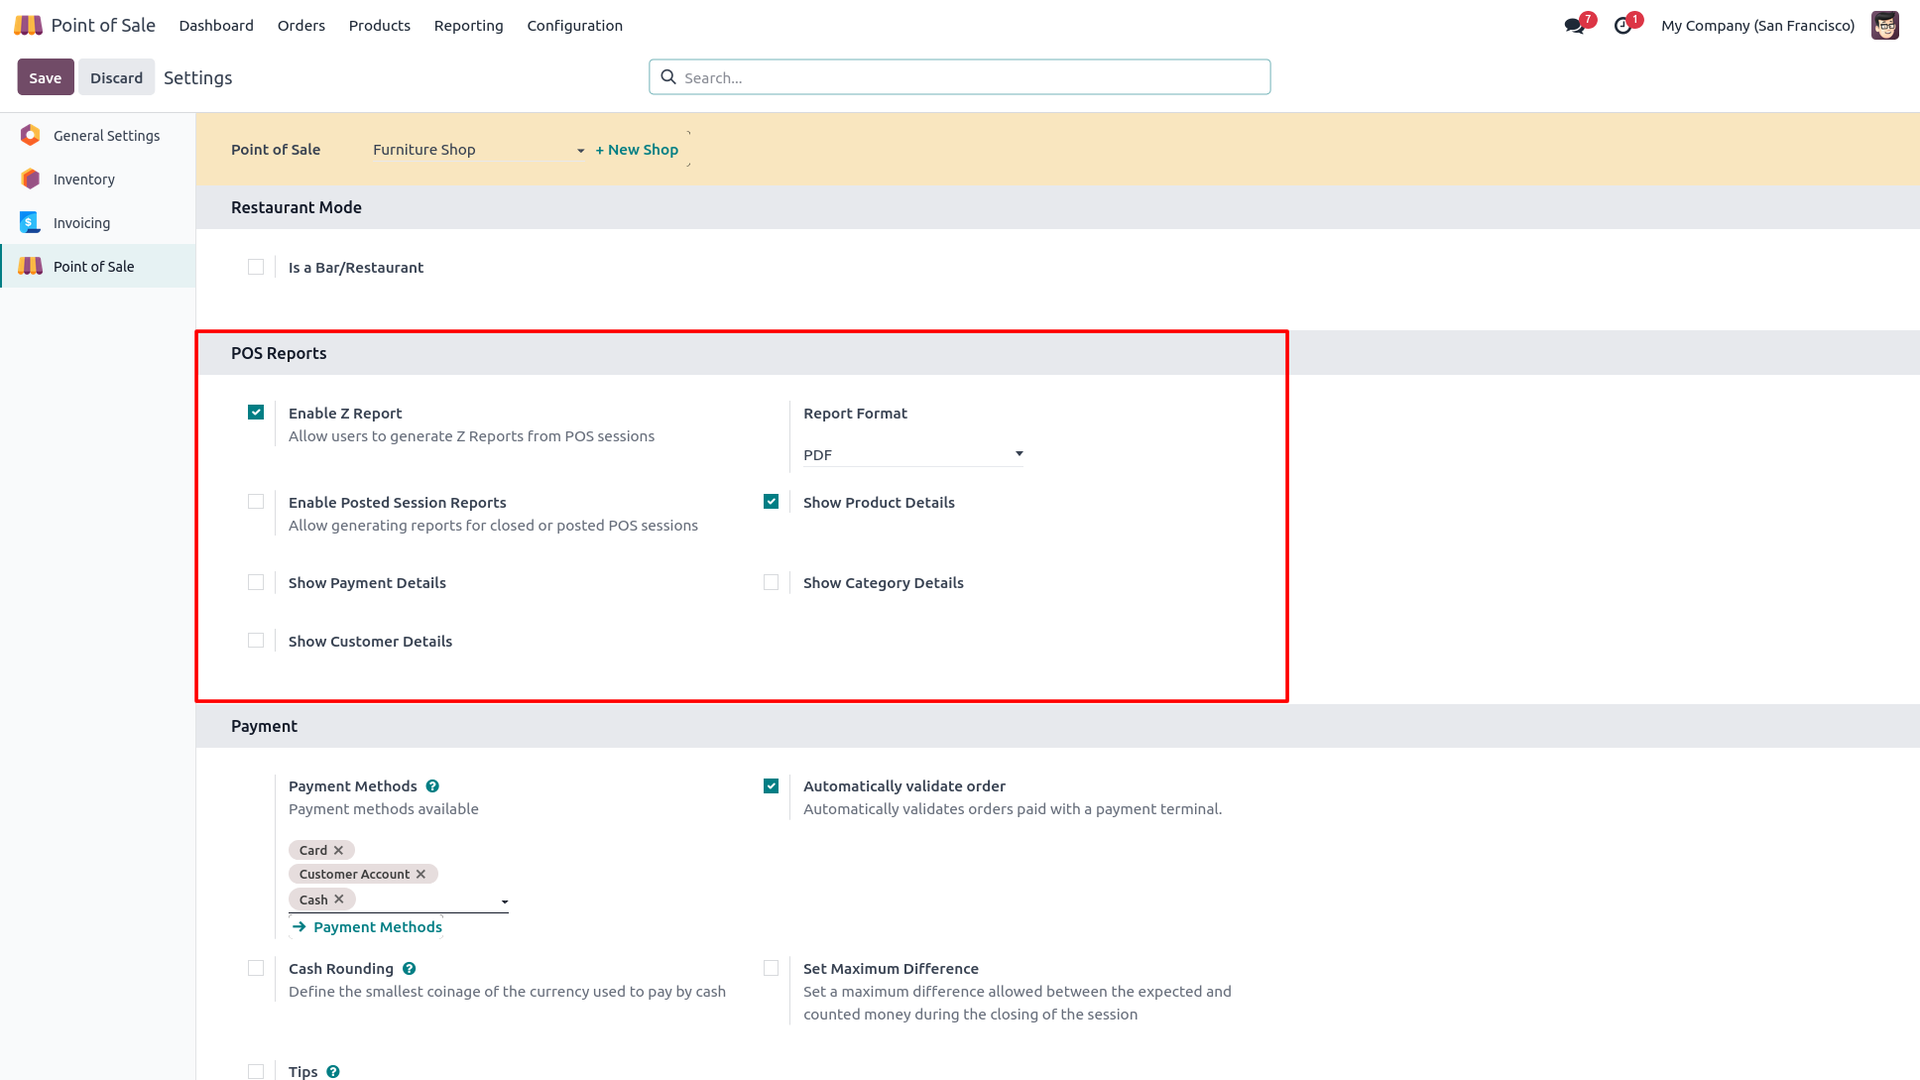
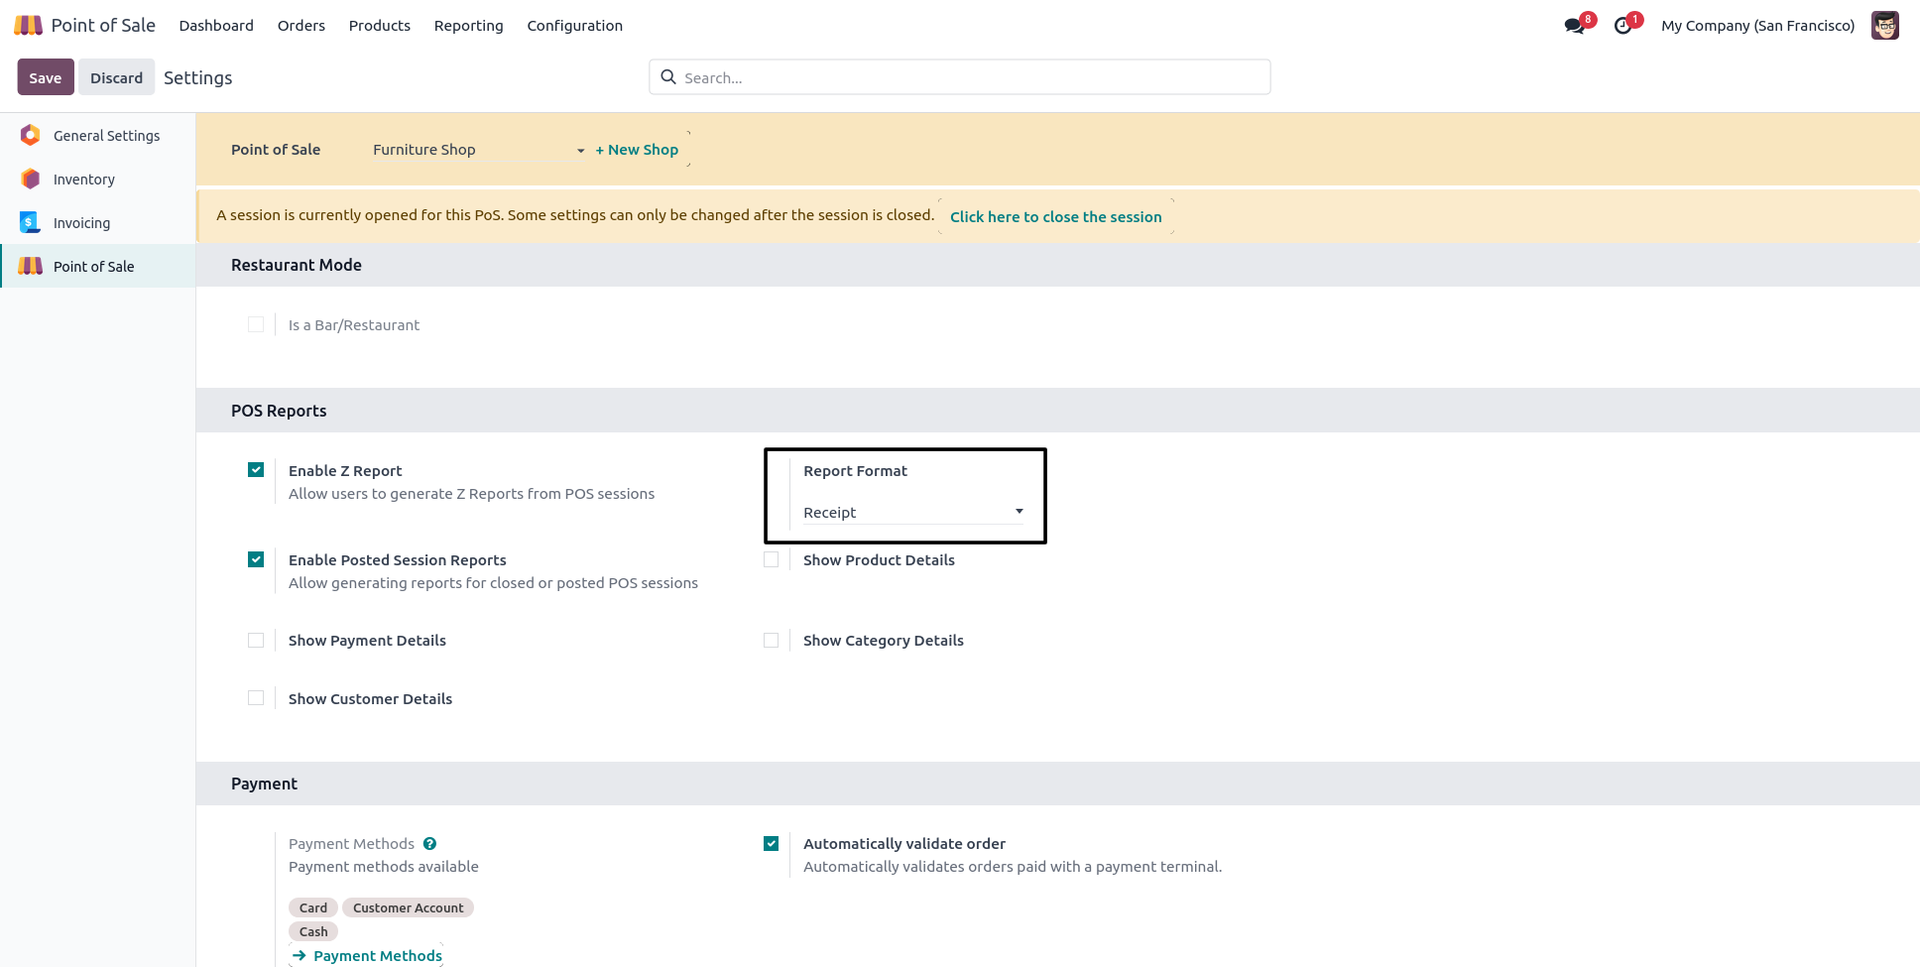
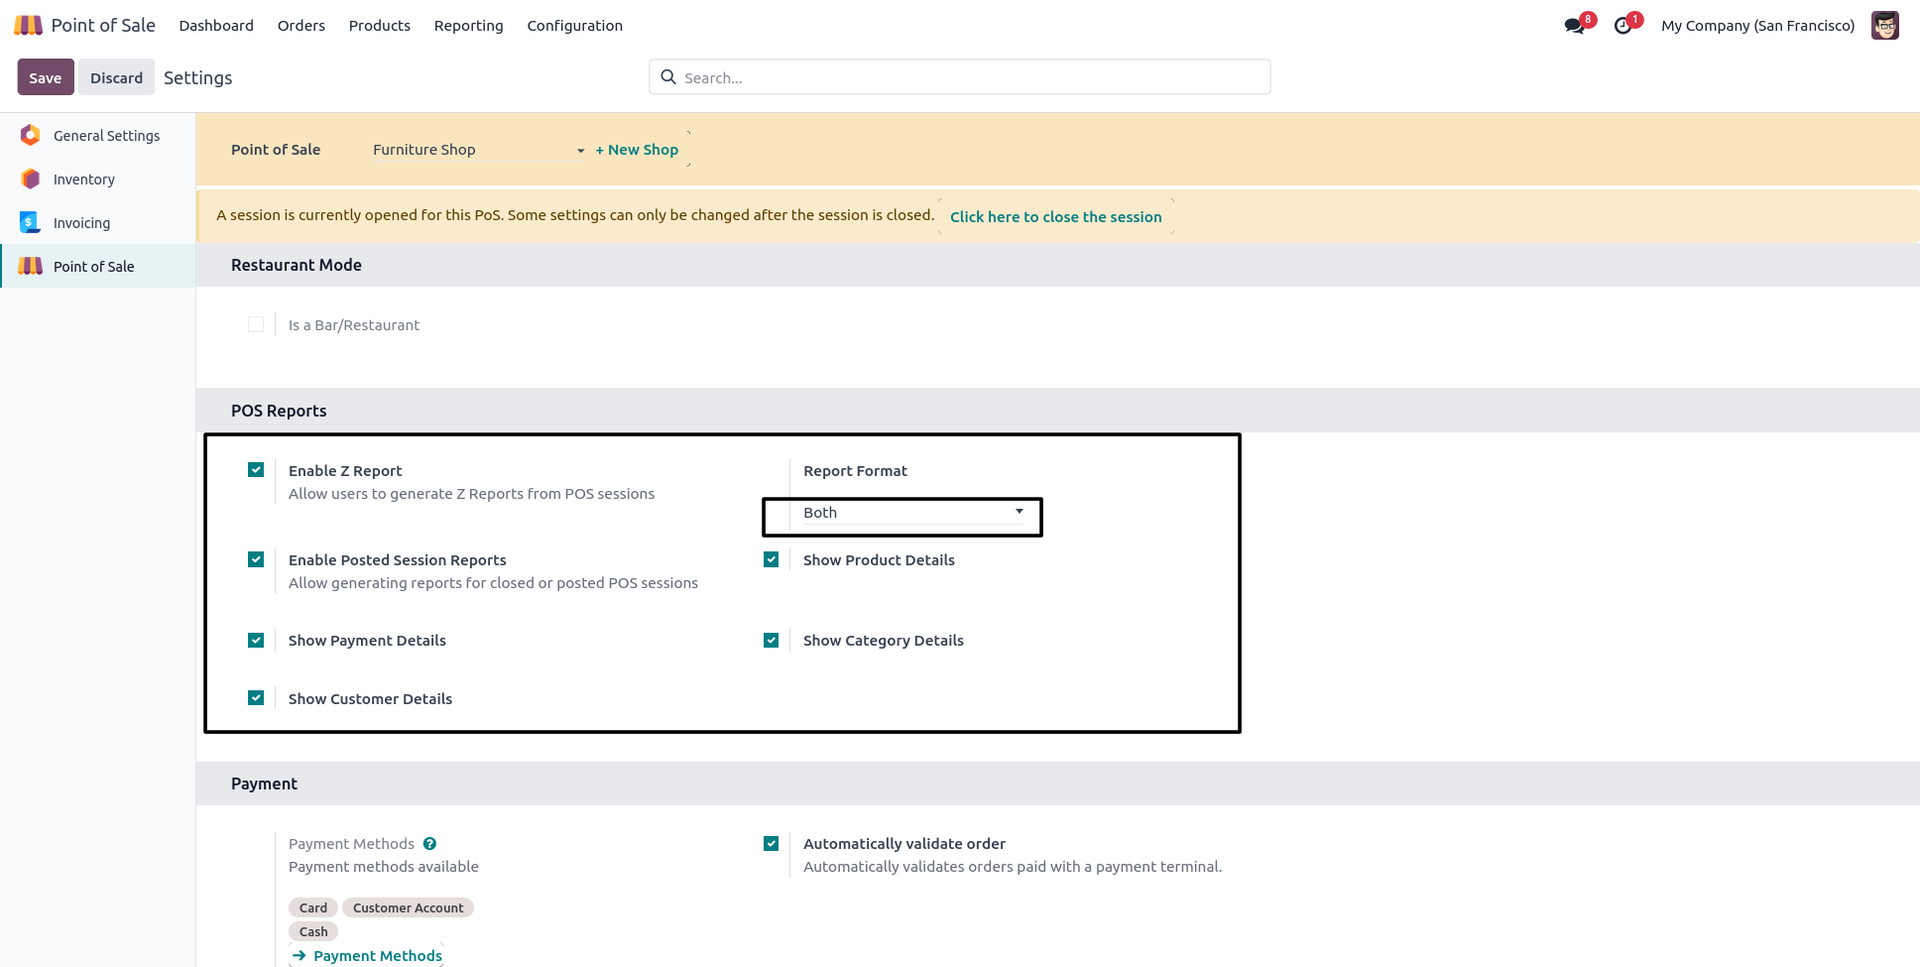
2. Go to POS settings, tick "Allow to Print Z Report", and select the format in which you want to print the report.
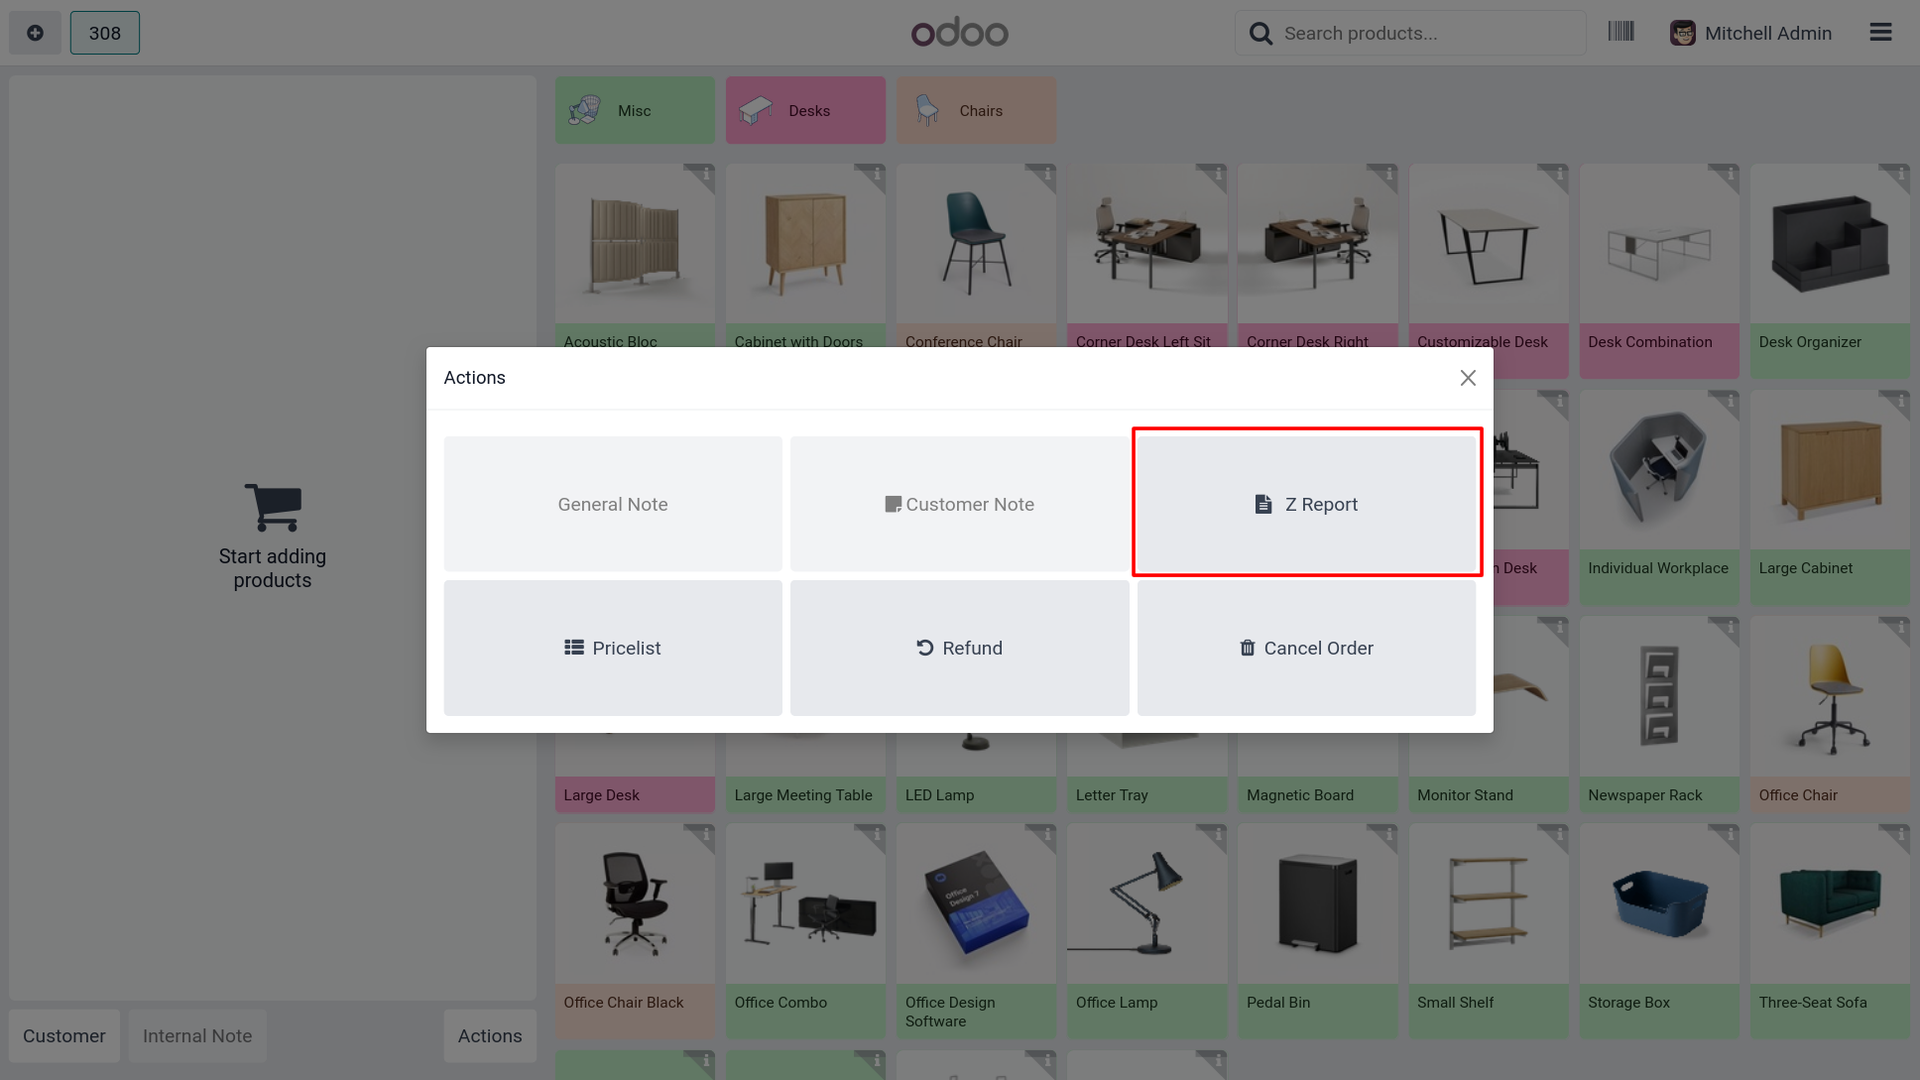
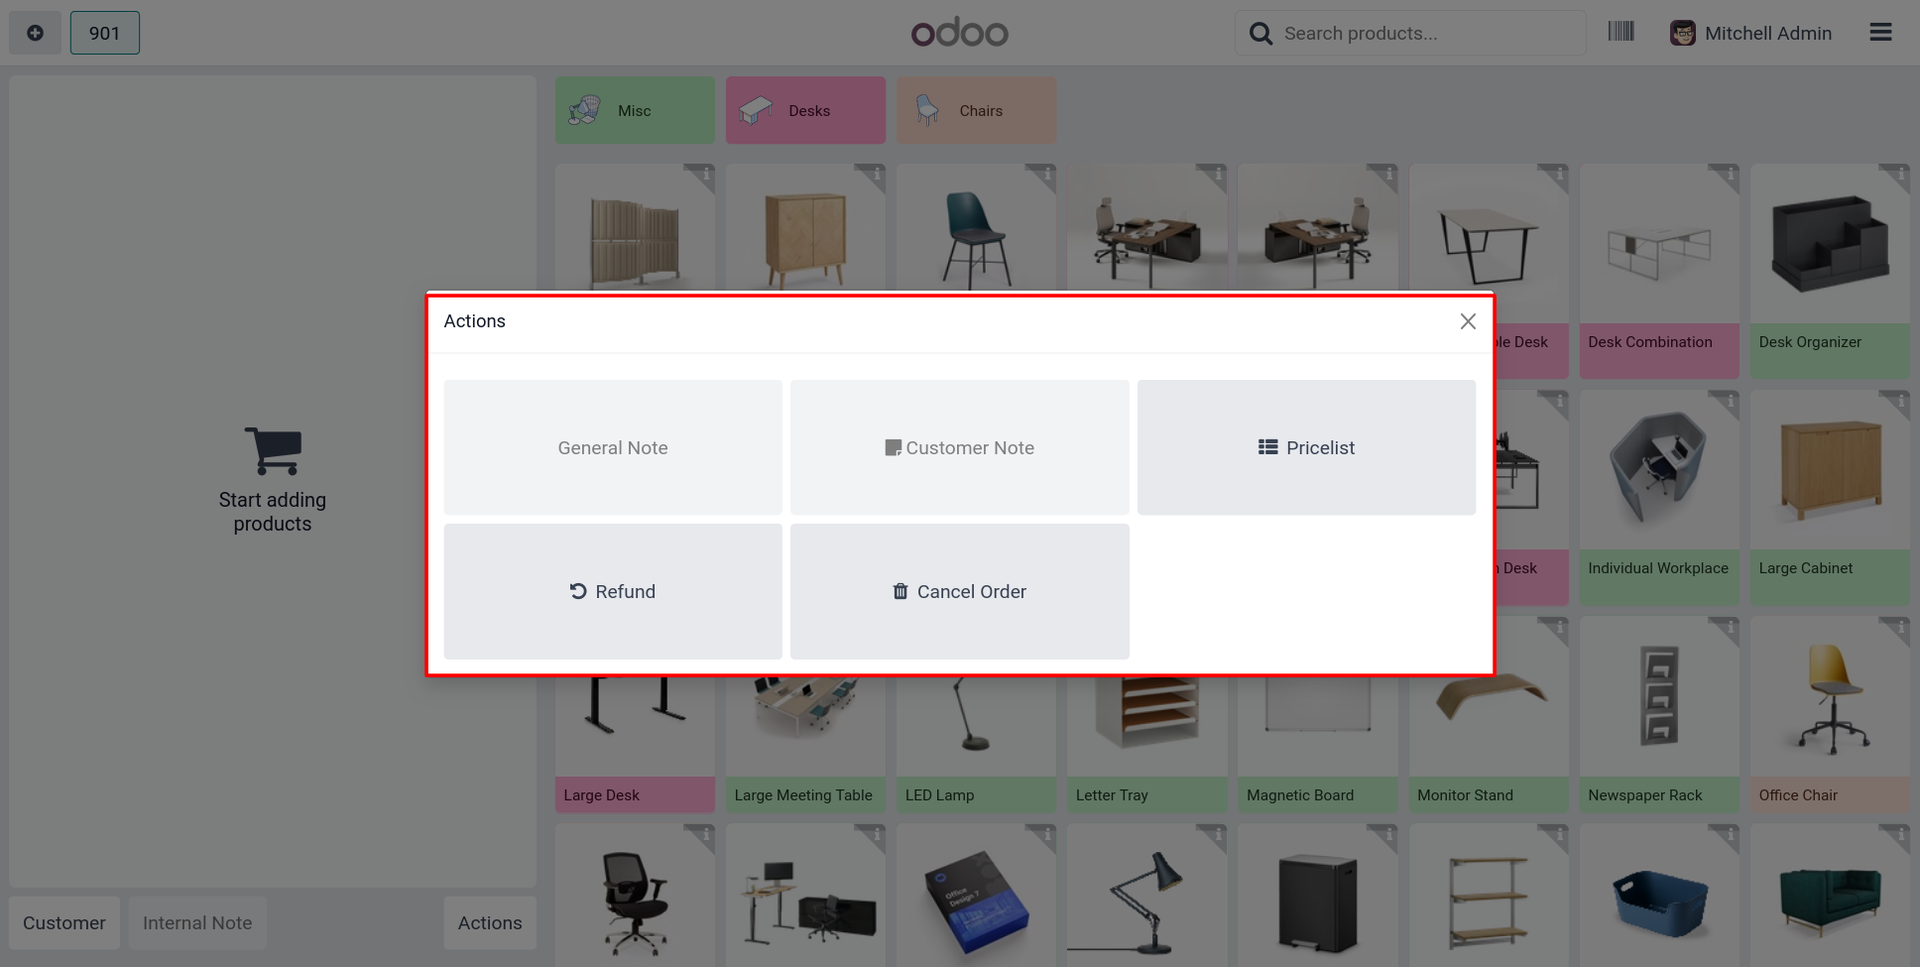
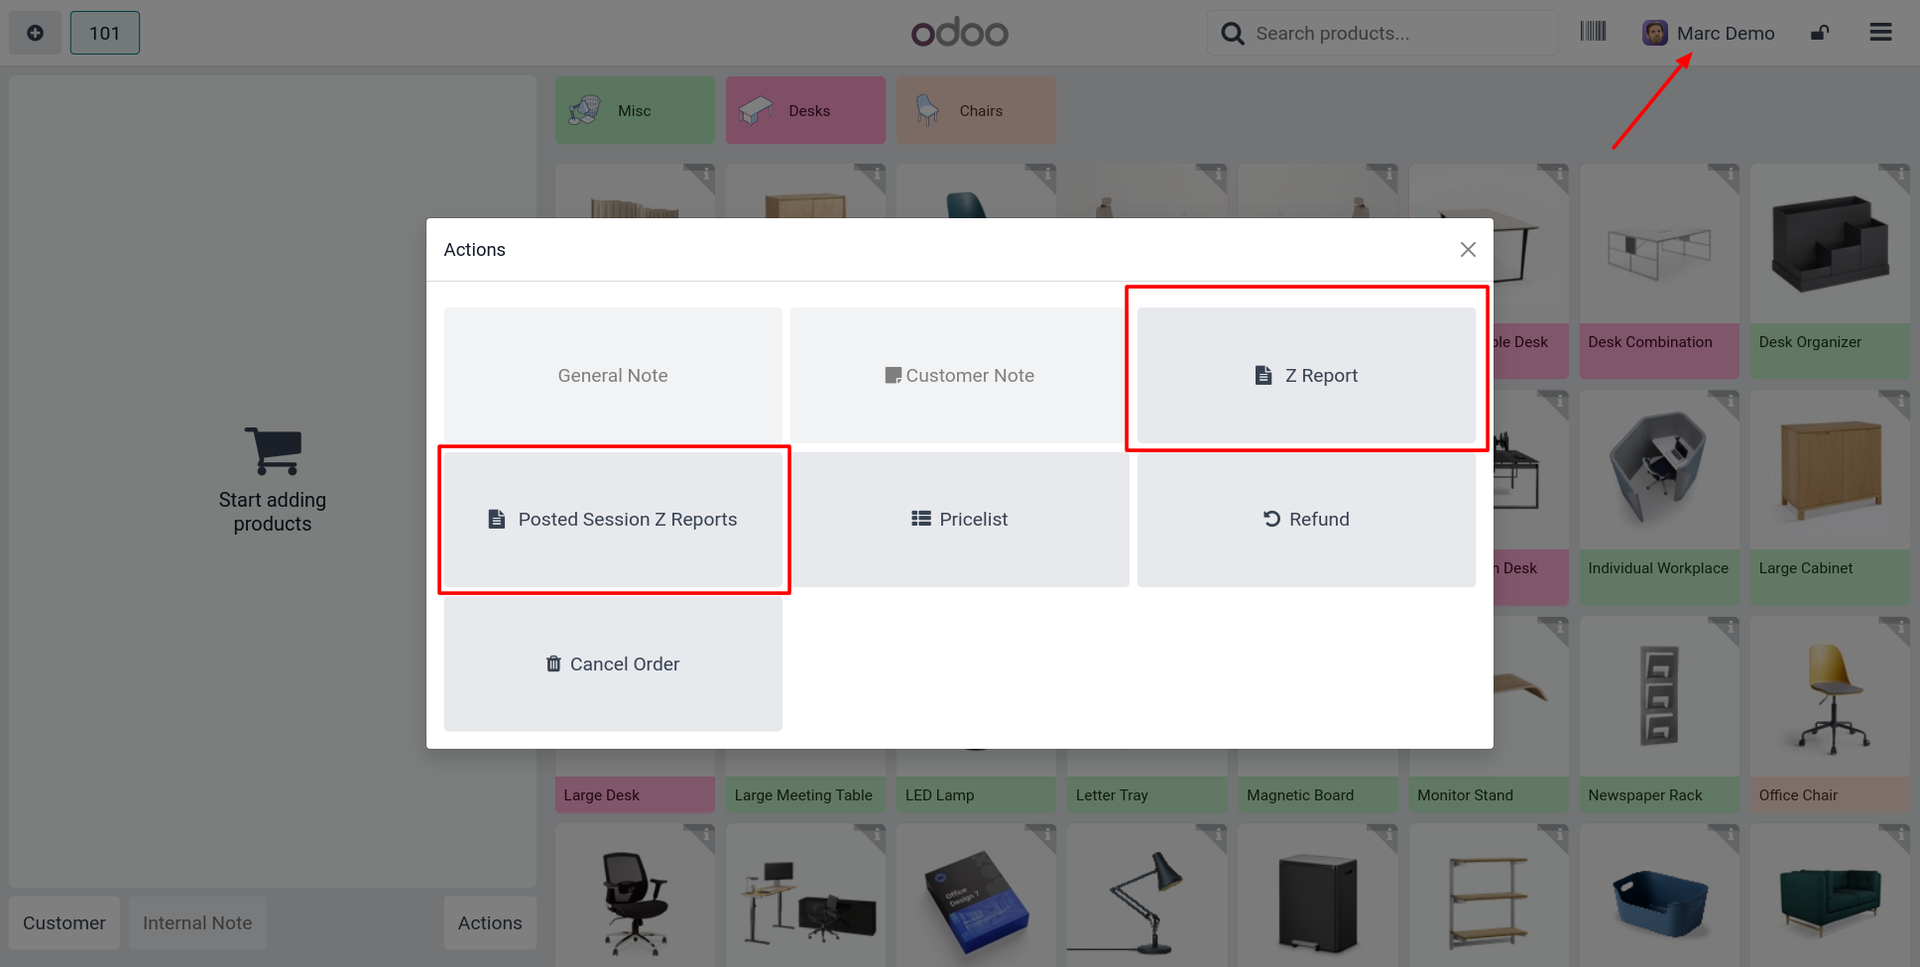
3. Click on the 'Action' button on the POS screen. The Z-report button will be available on the 'Actions' wizard.
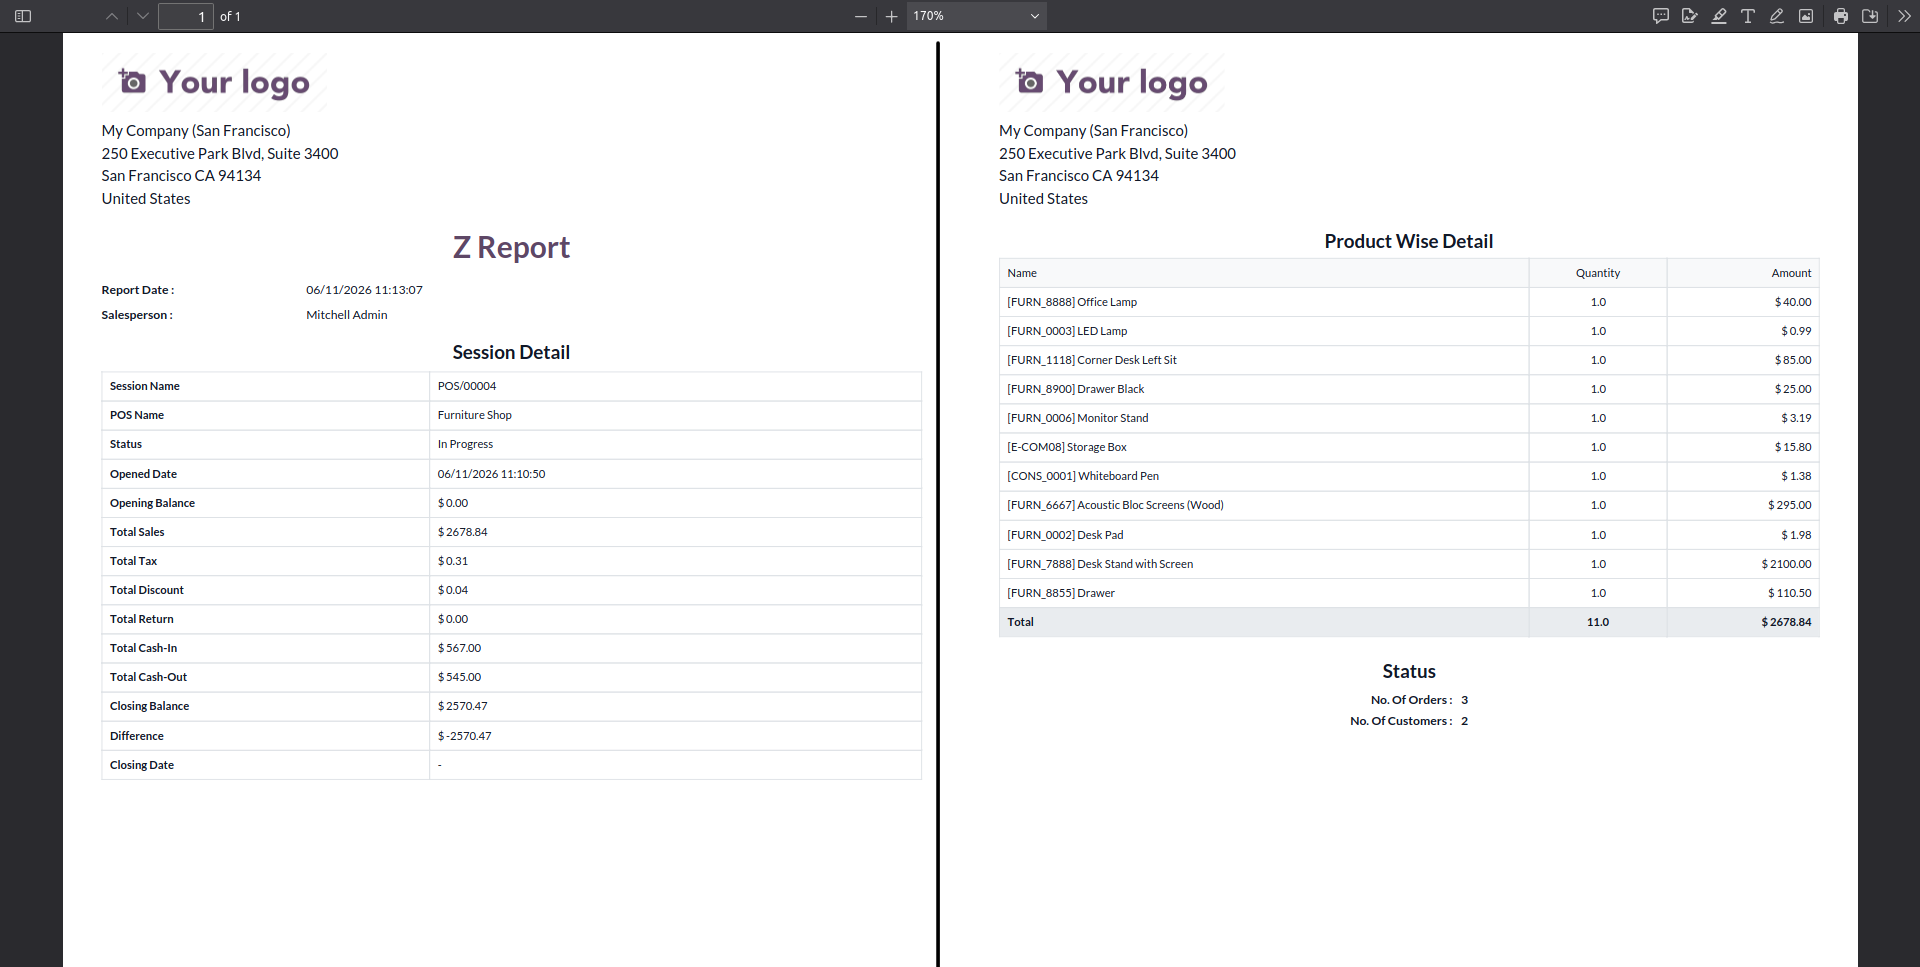
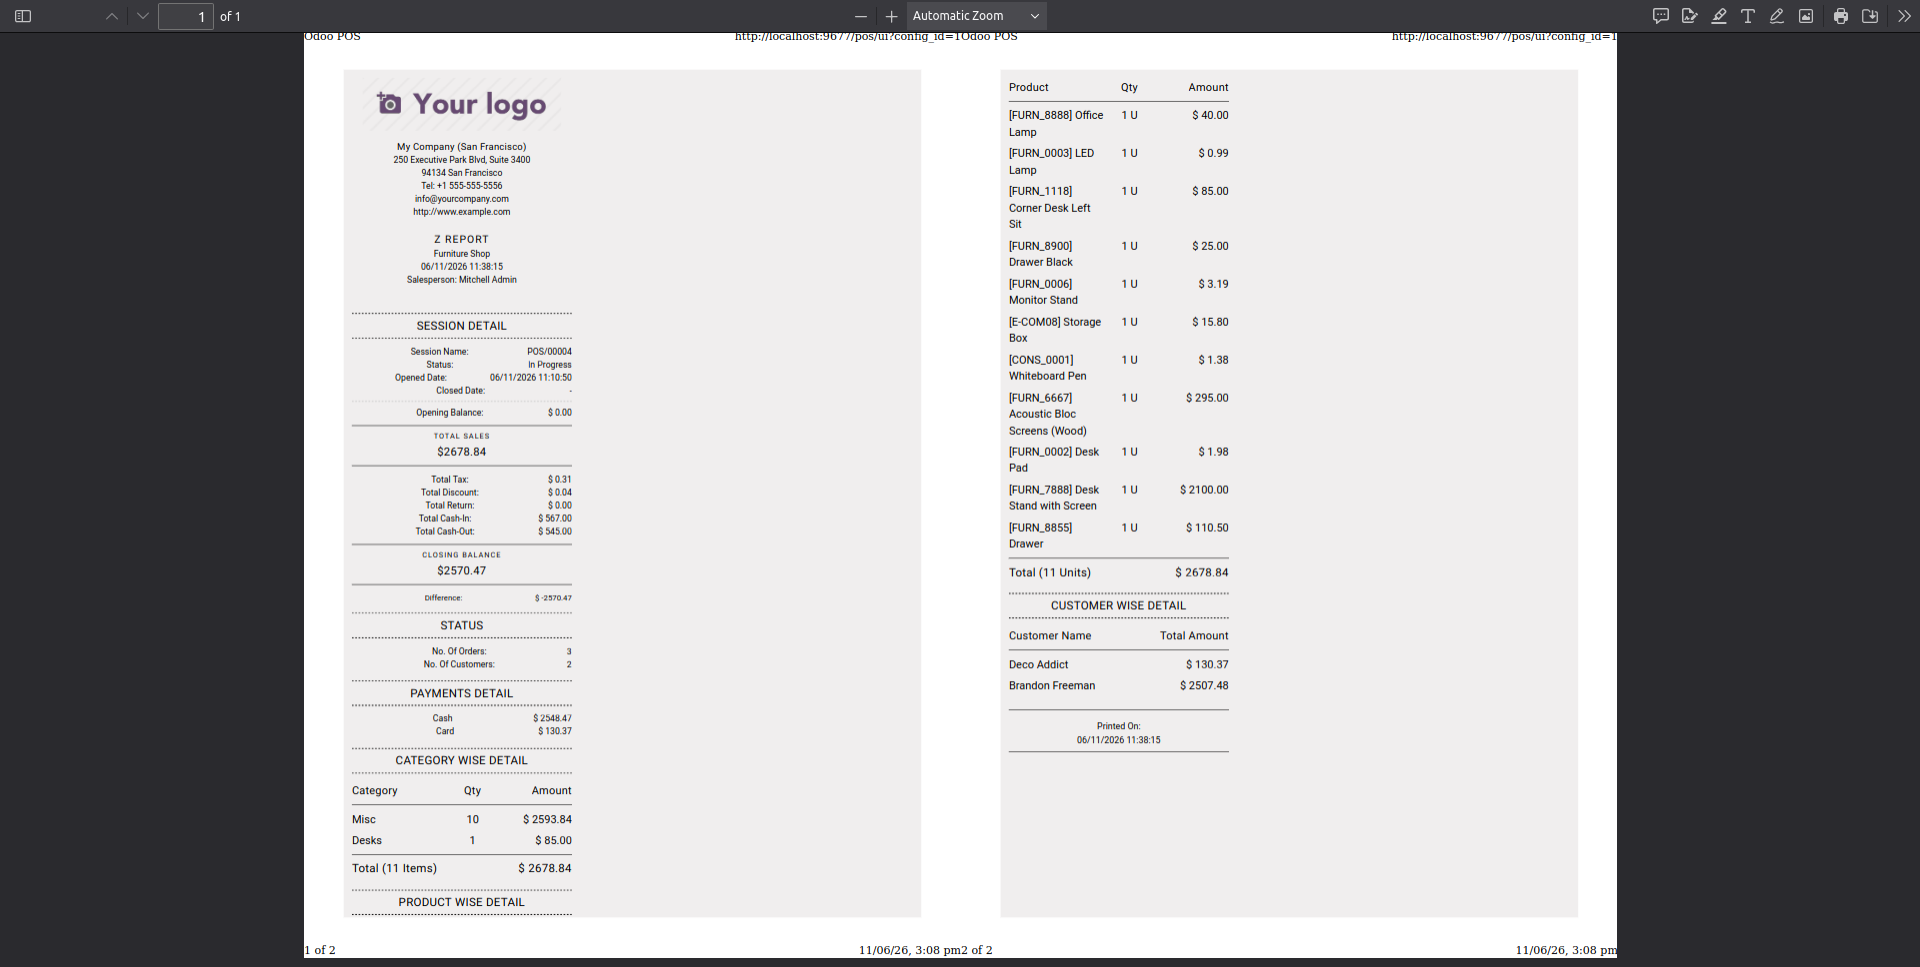
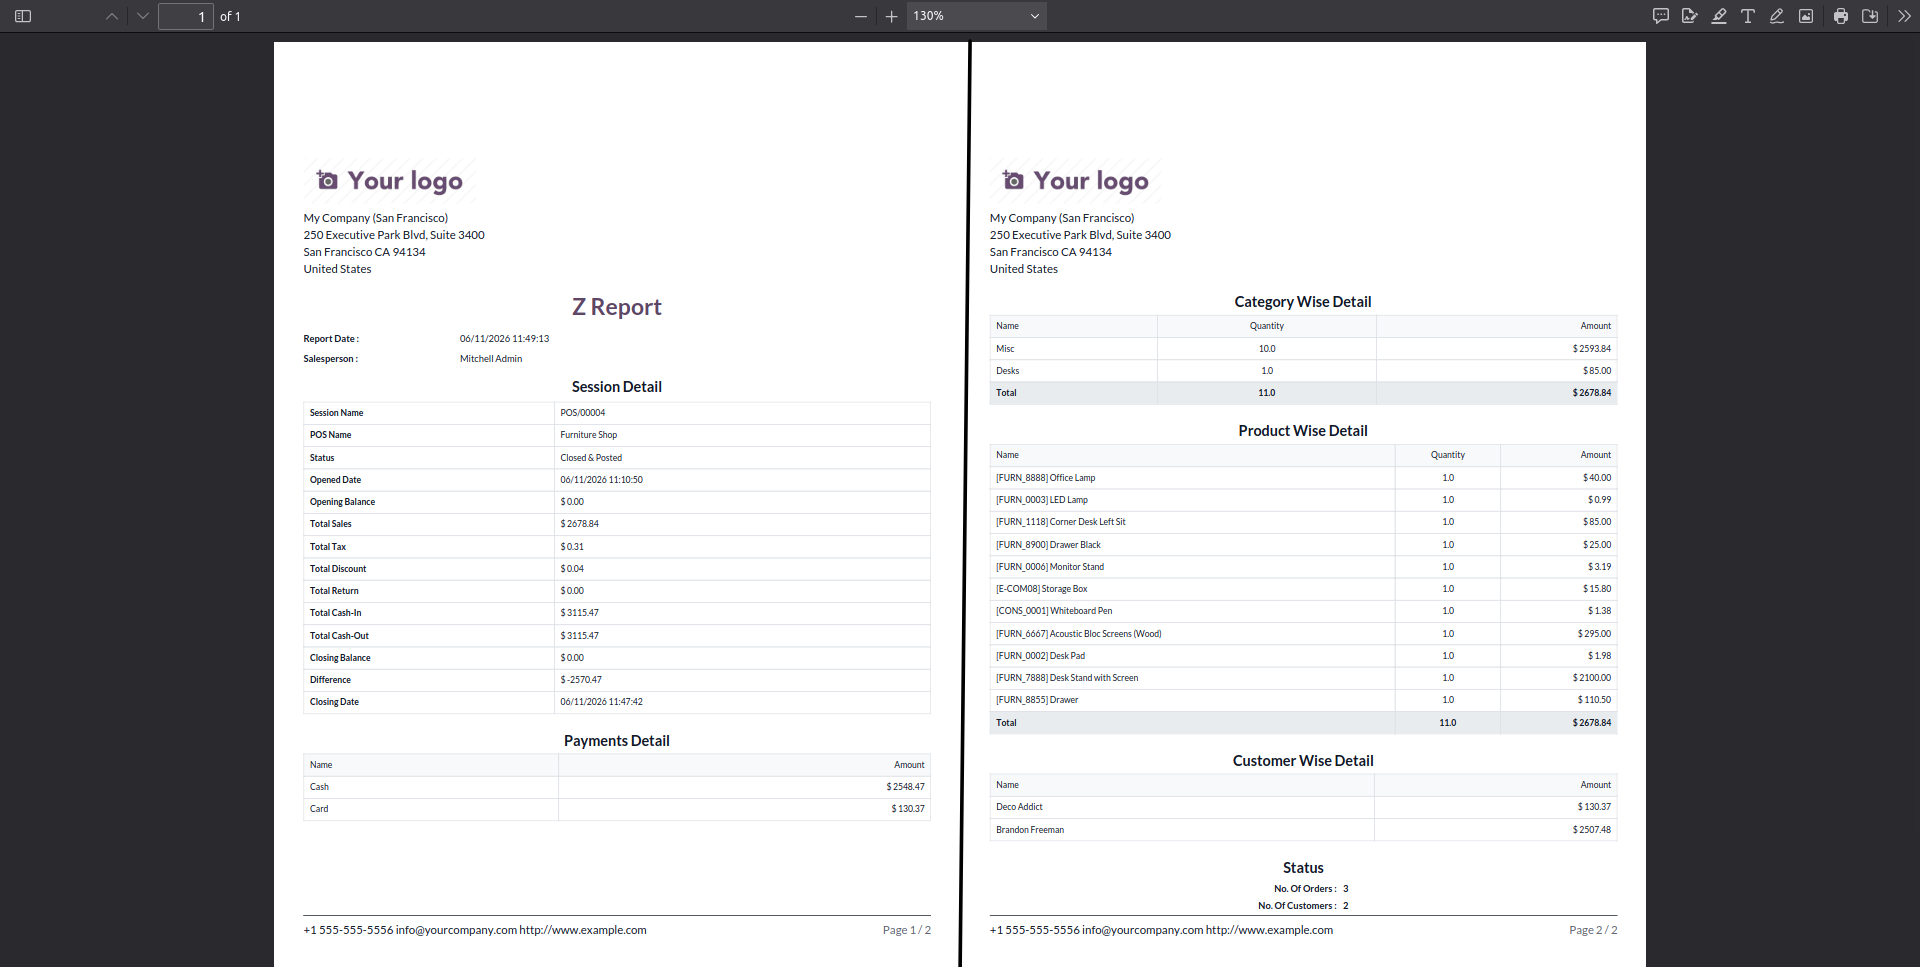
4. The Z-report for the current session will look like the image below, containing the overall session and Product Wise Details.
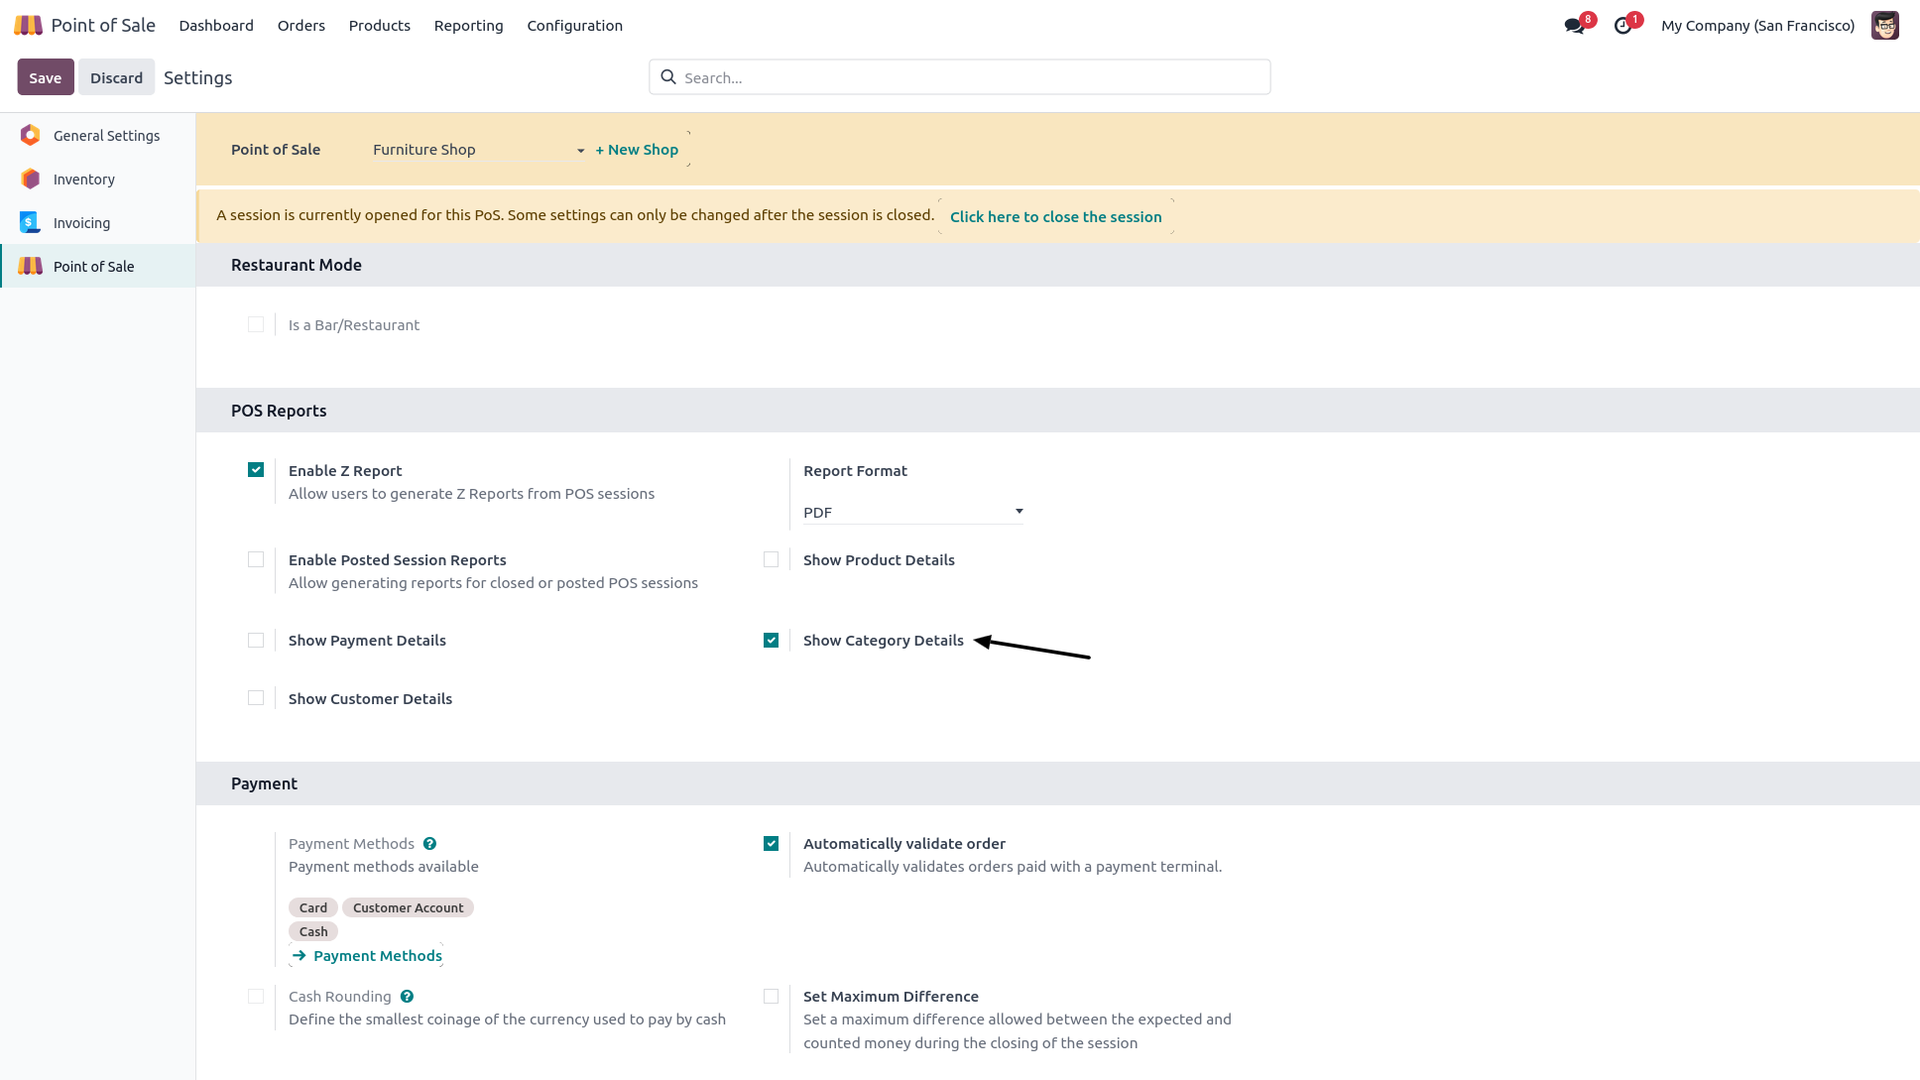
5. If you want to print the report category-wise, then go to the POS settings and tick "Display Category Wise Detail".
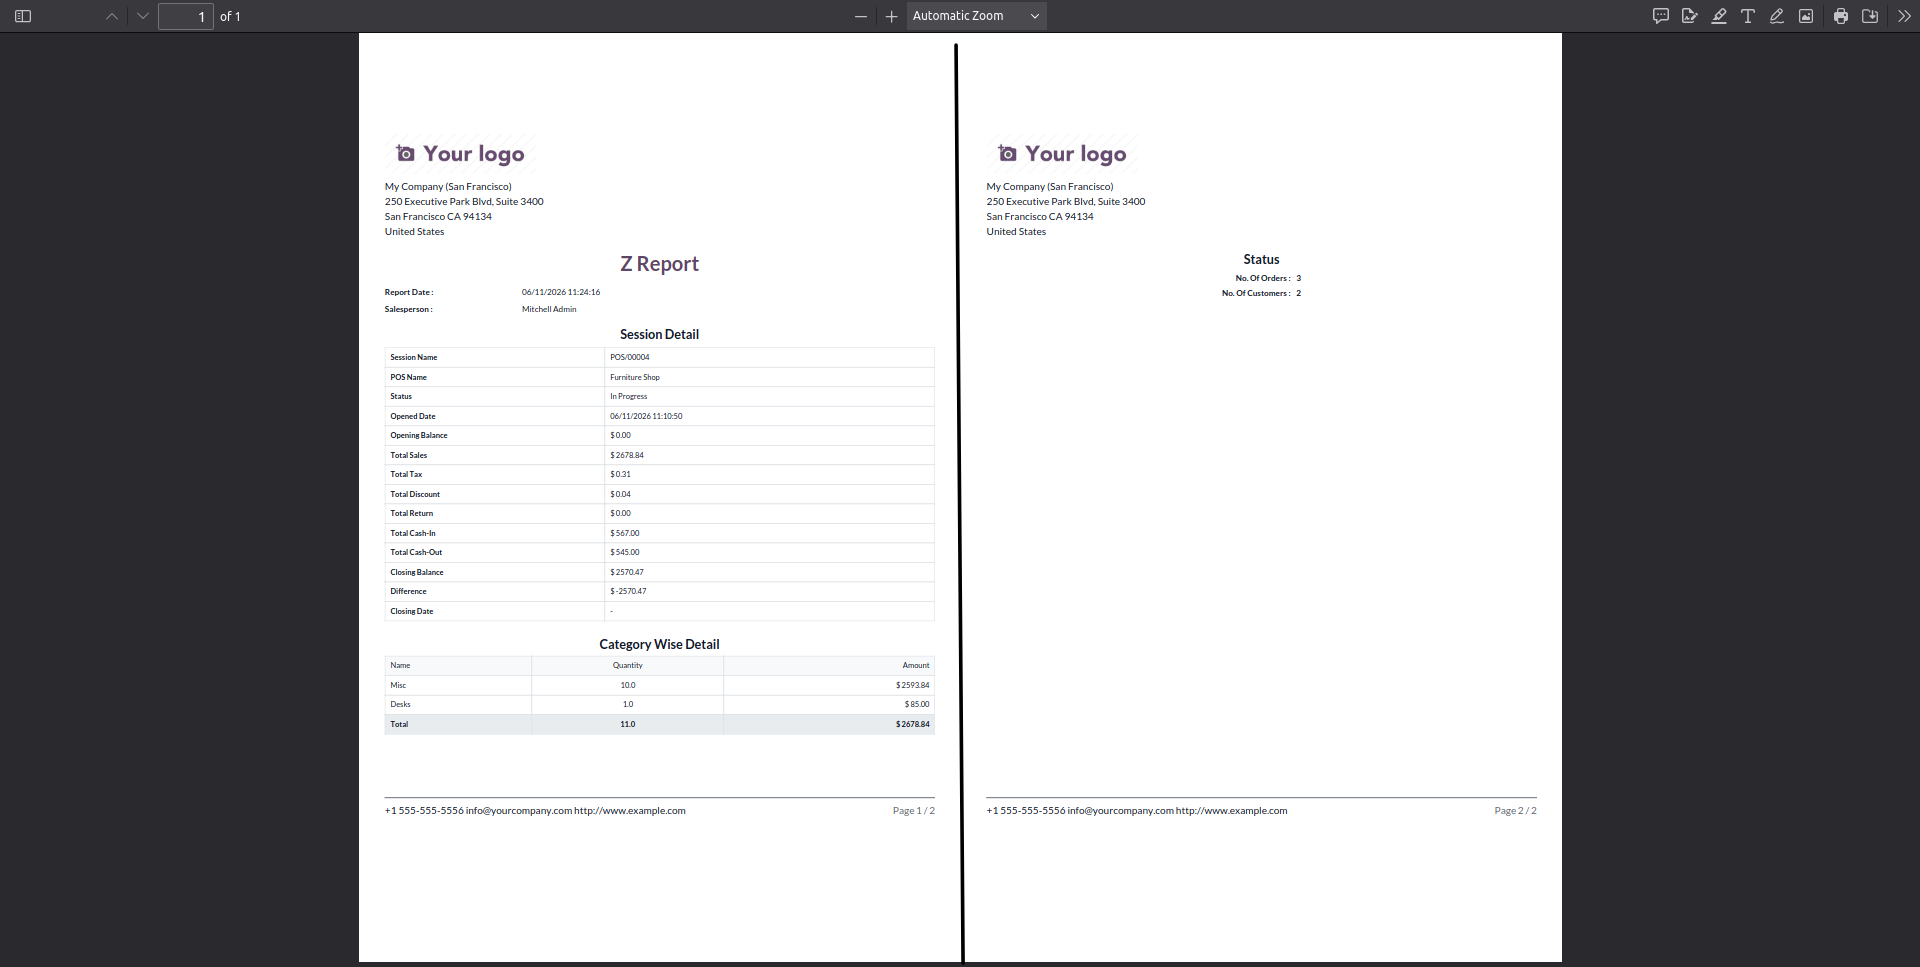
6. The category-wise Z-report looks like the image below, displaying transactions associated with specific categories.
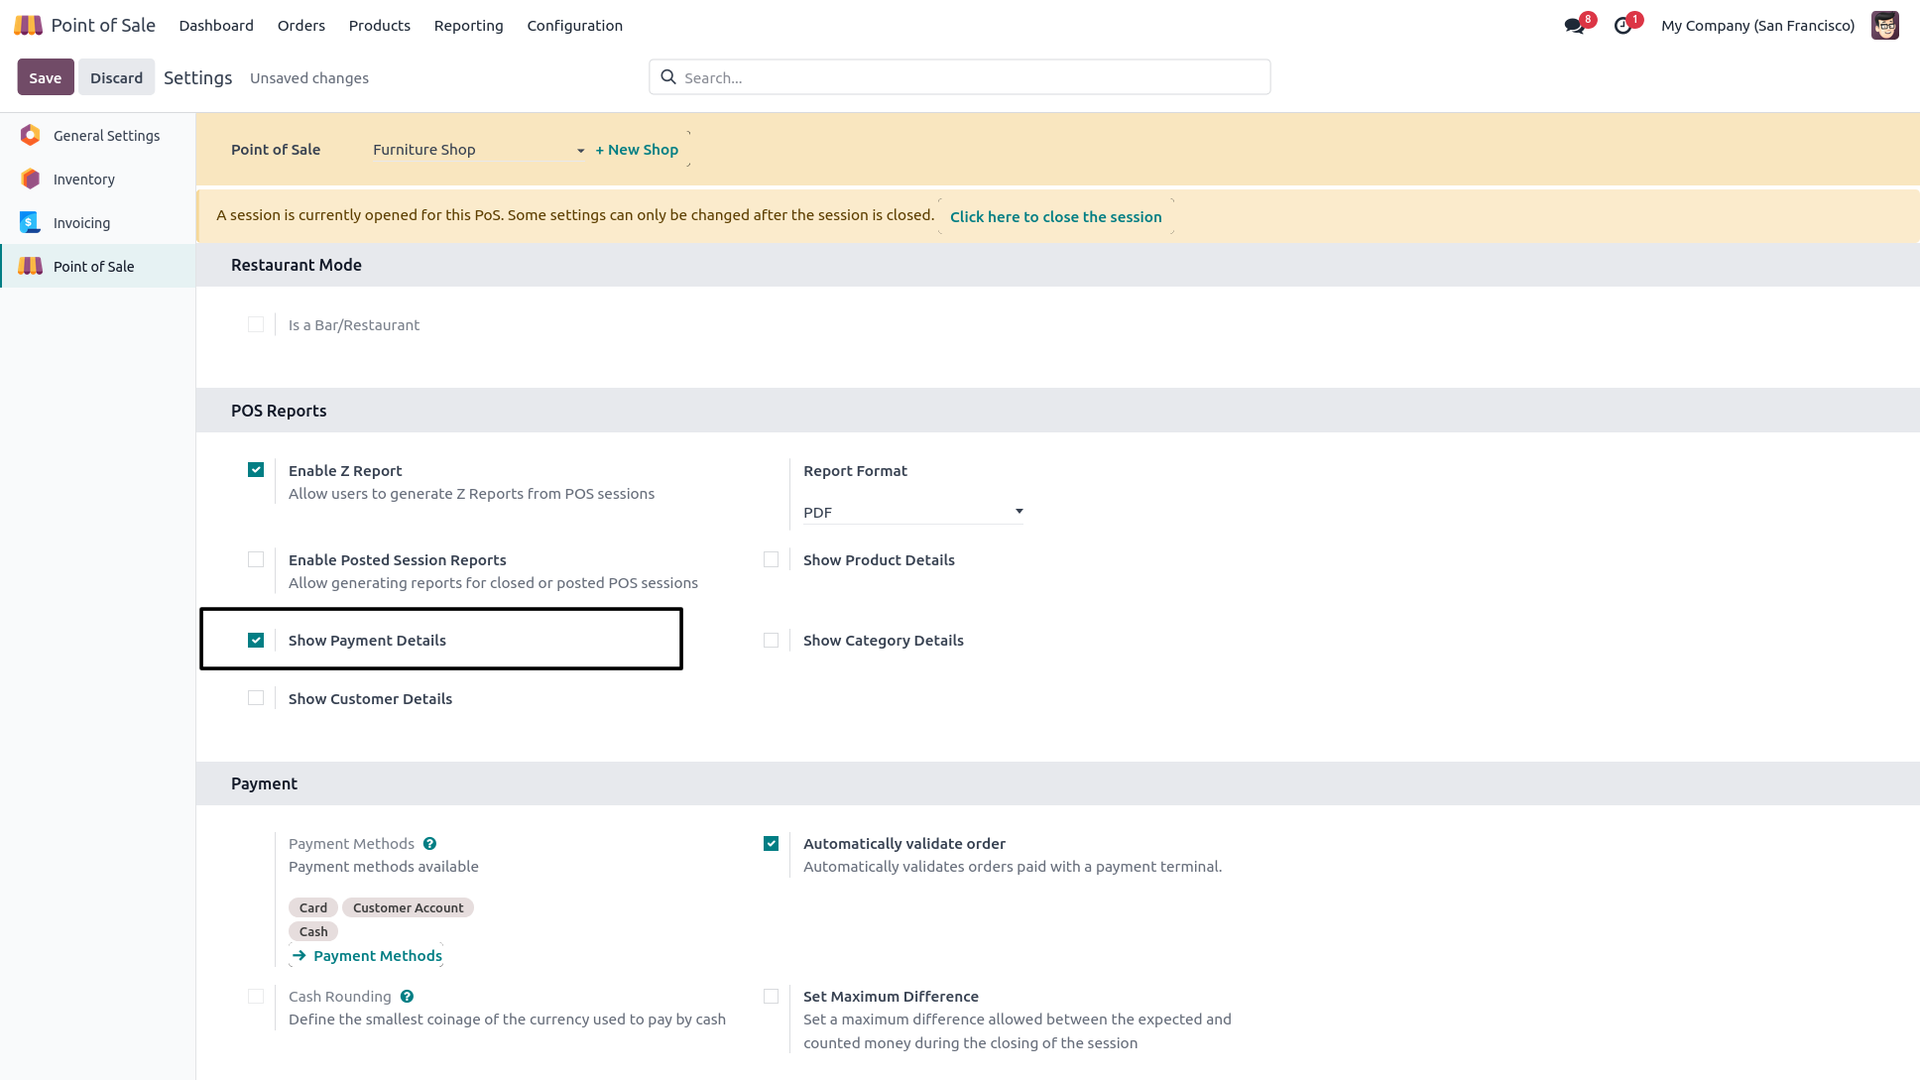
7. If you want to print the Payment details of the session, then go to the POS settings and tick "Display Payment Detail".

8. The Payment-wise Z-report looks like the image below, showing exact amounts for specific payment methods.
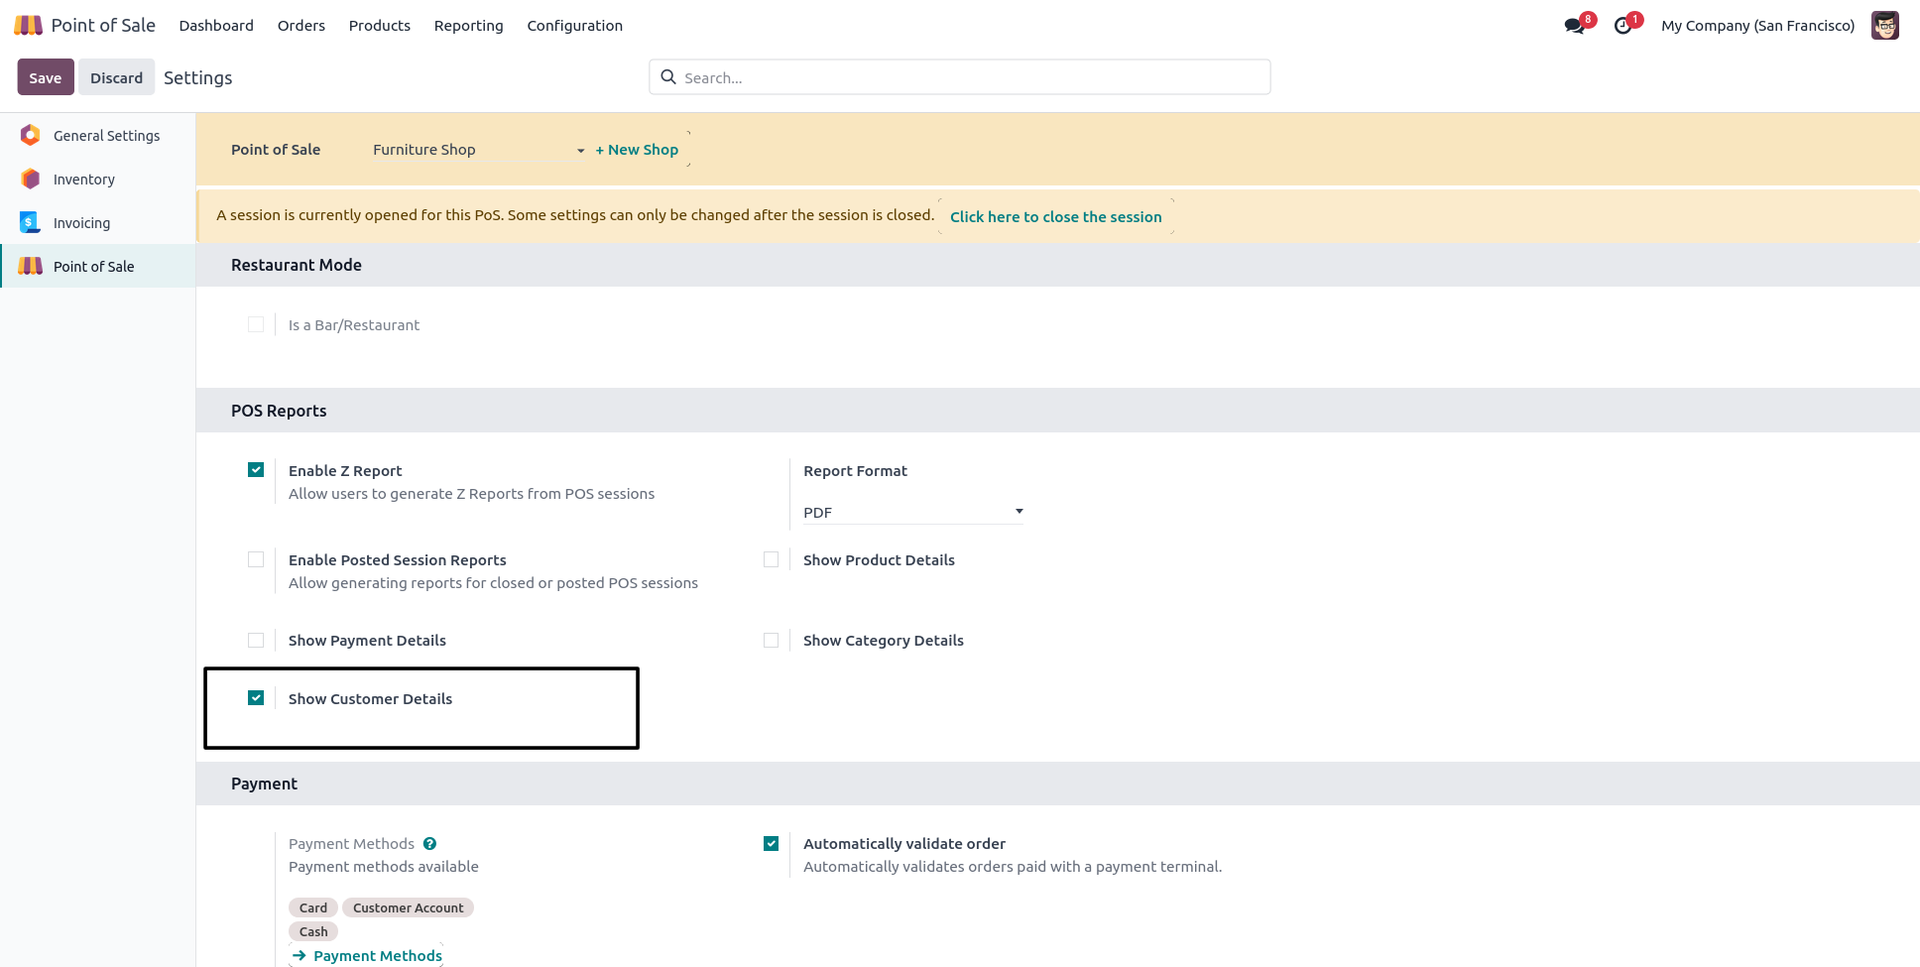
9. If you want to print the customer details of the session, then go to the POS settings and tick "Display Customer Wise Detail".
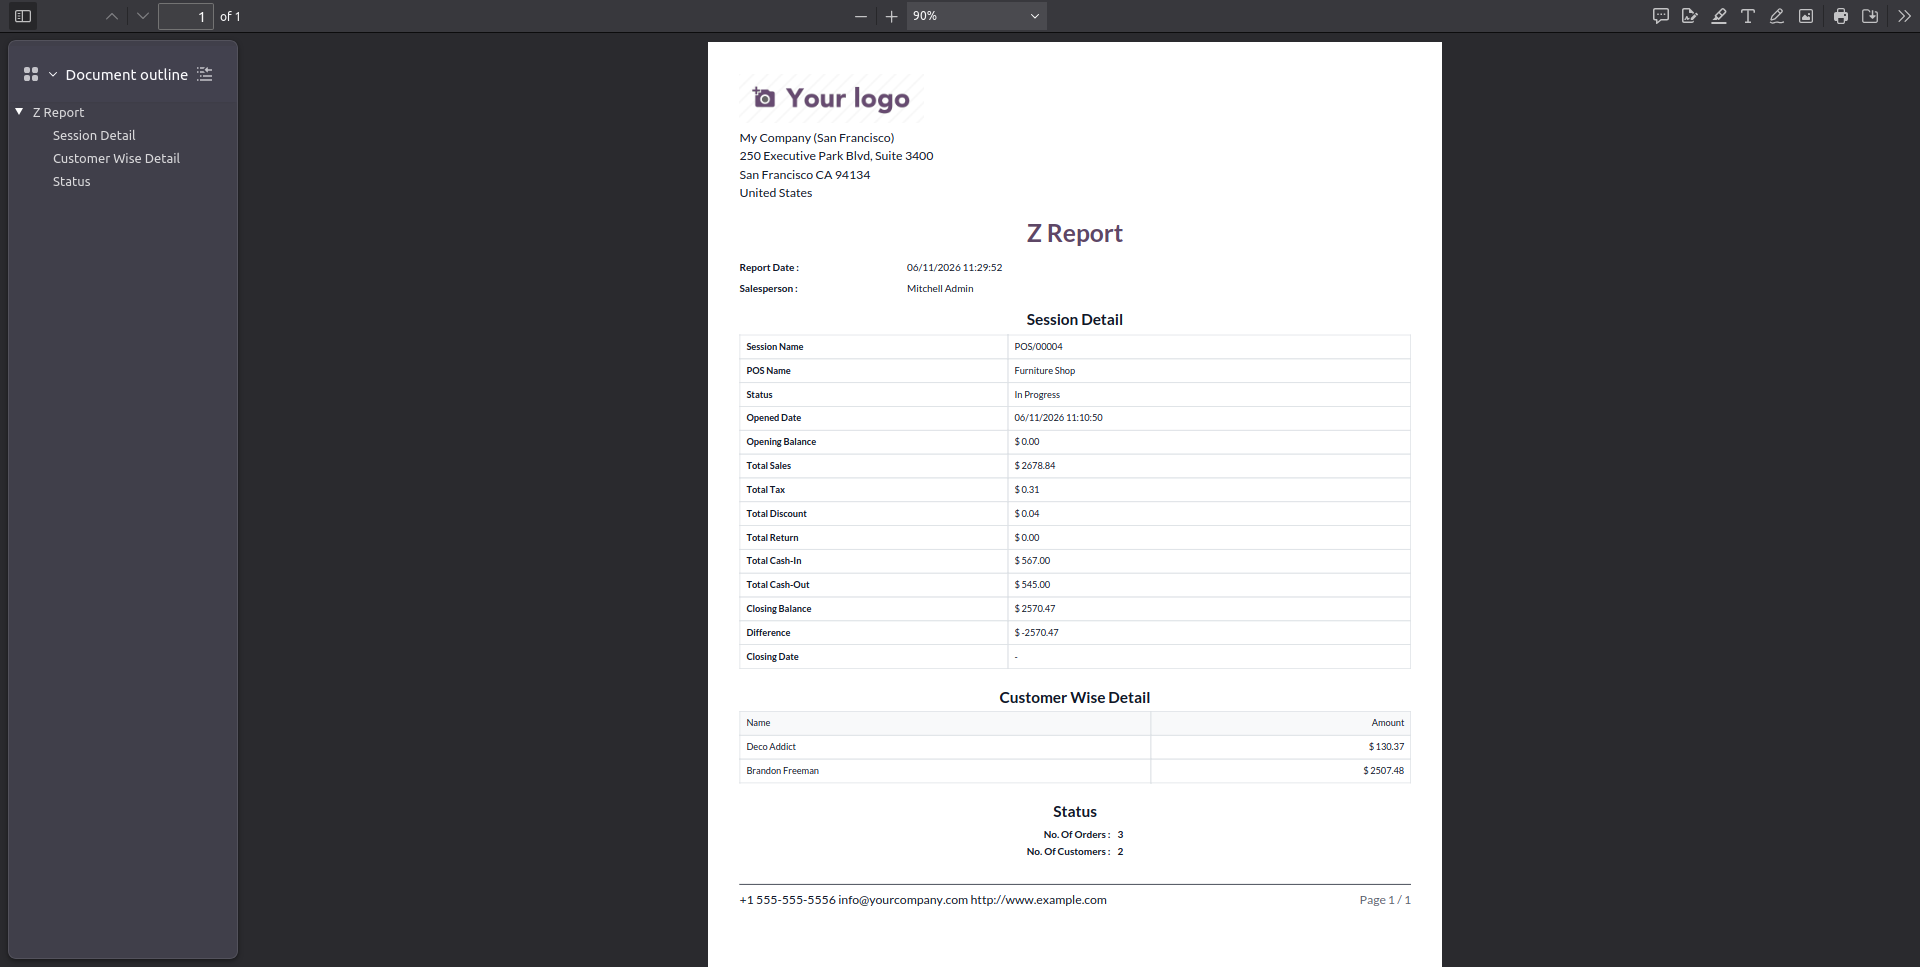
10. The Z-report with the payment details looks like the image below, covering customer wise details.
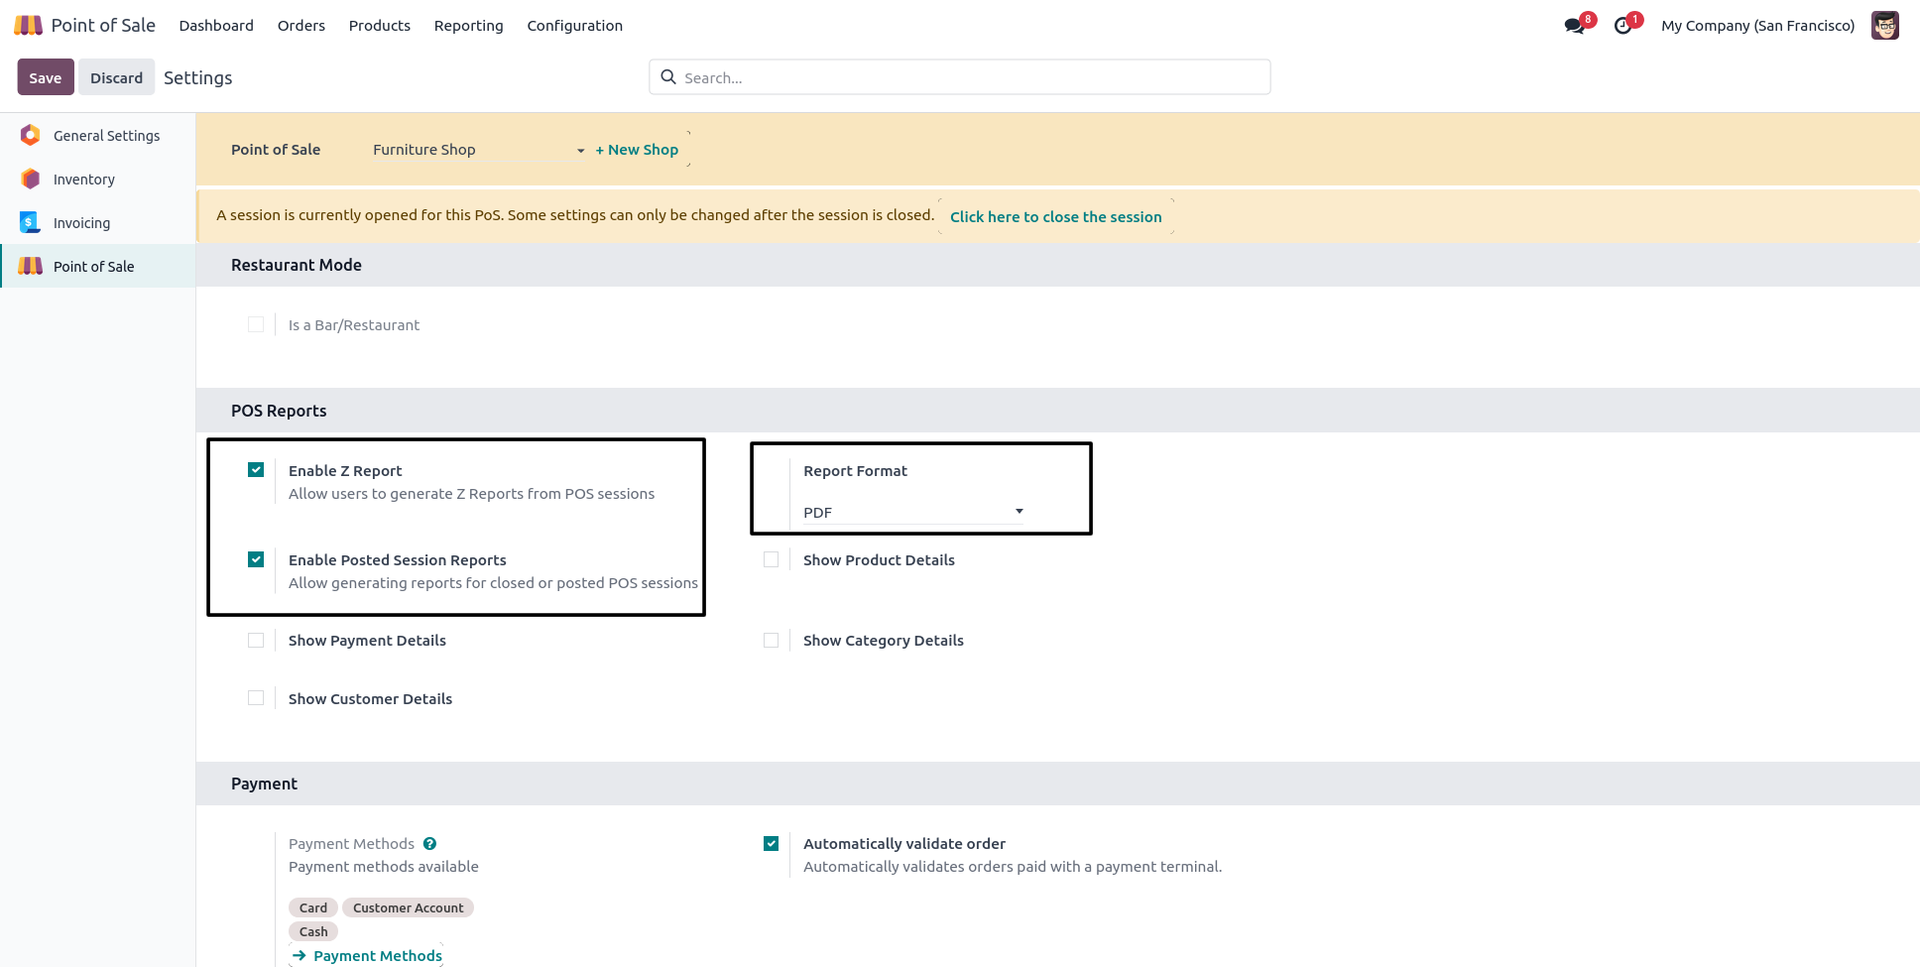
11. Go to POS settings and tick "Allow Posted Session Report" to enable reporting for previously closed sessions.
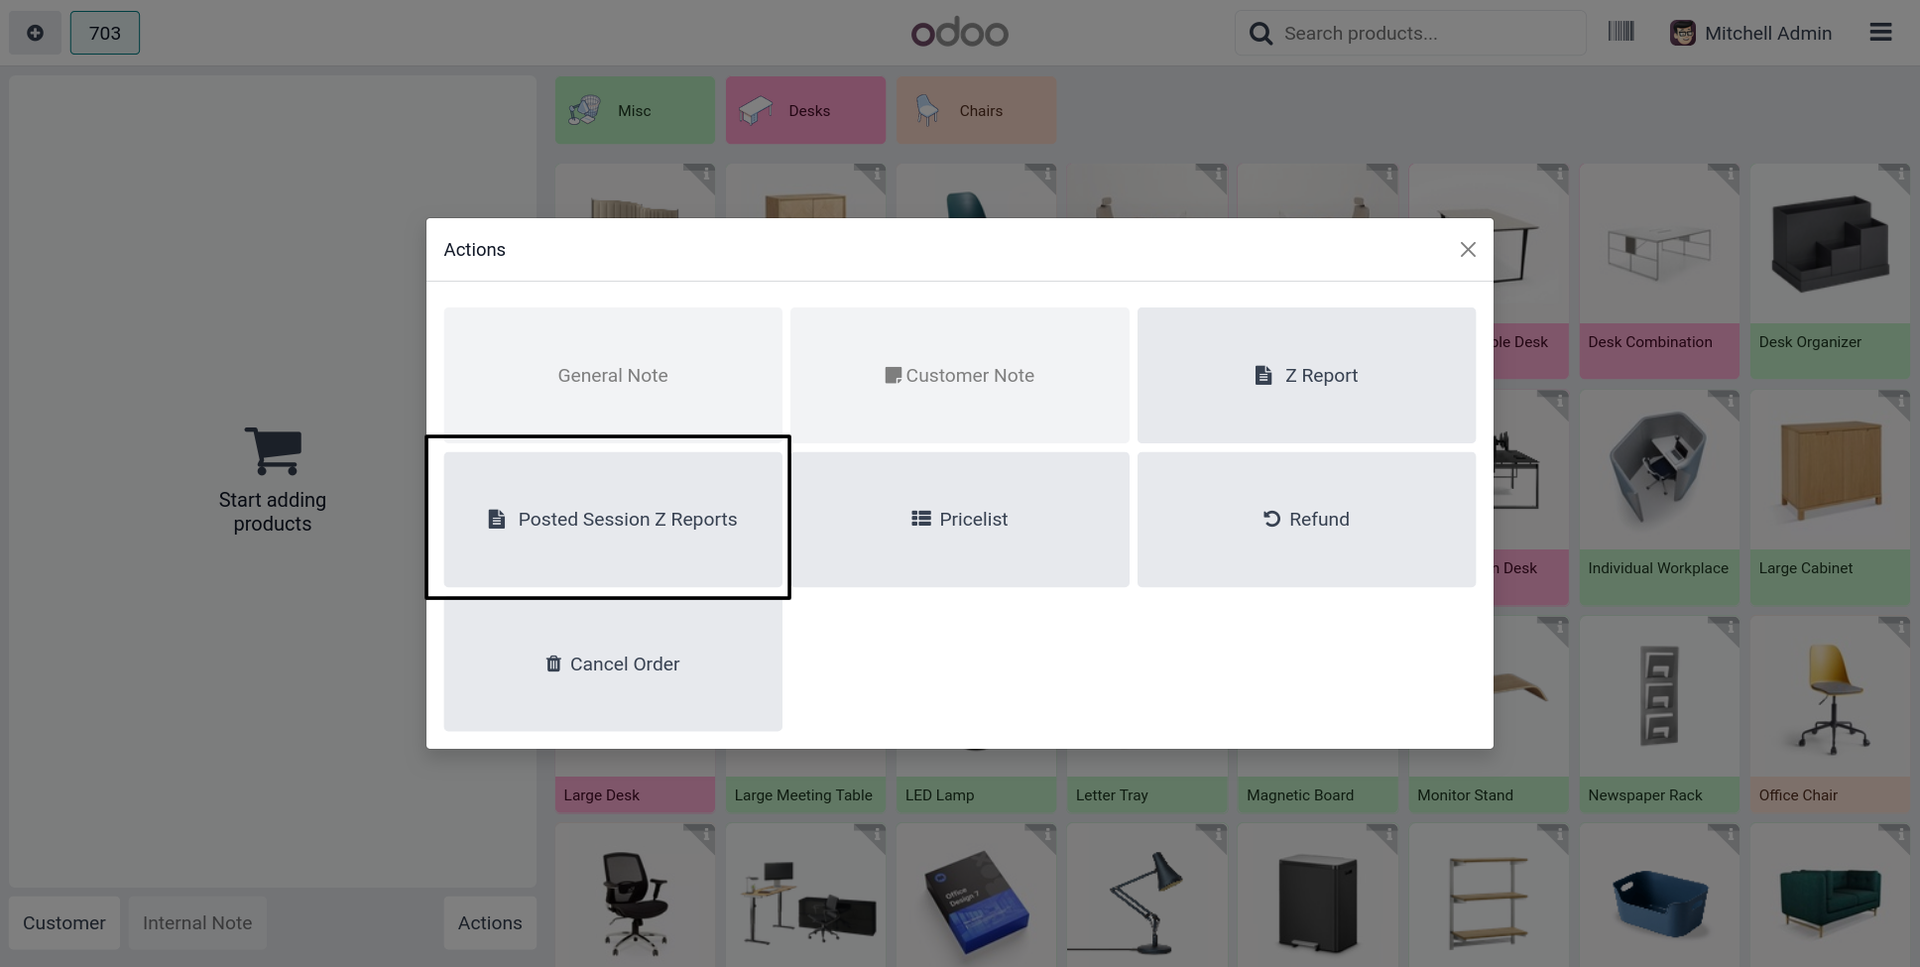
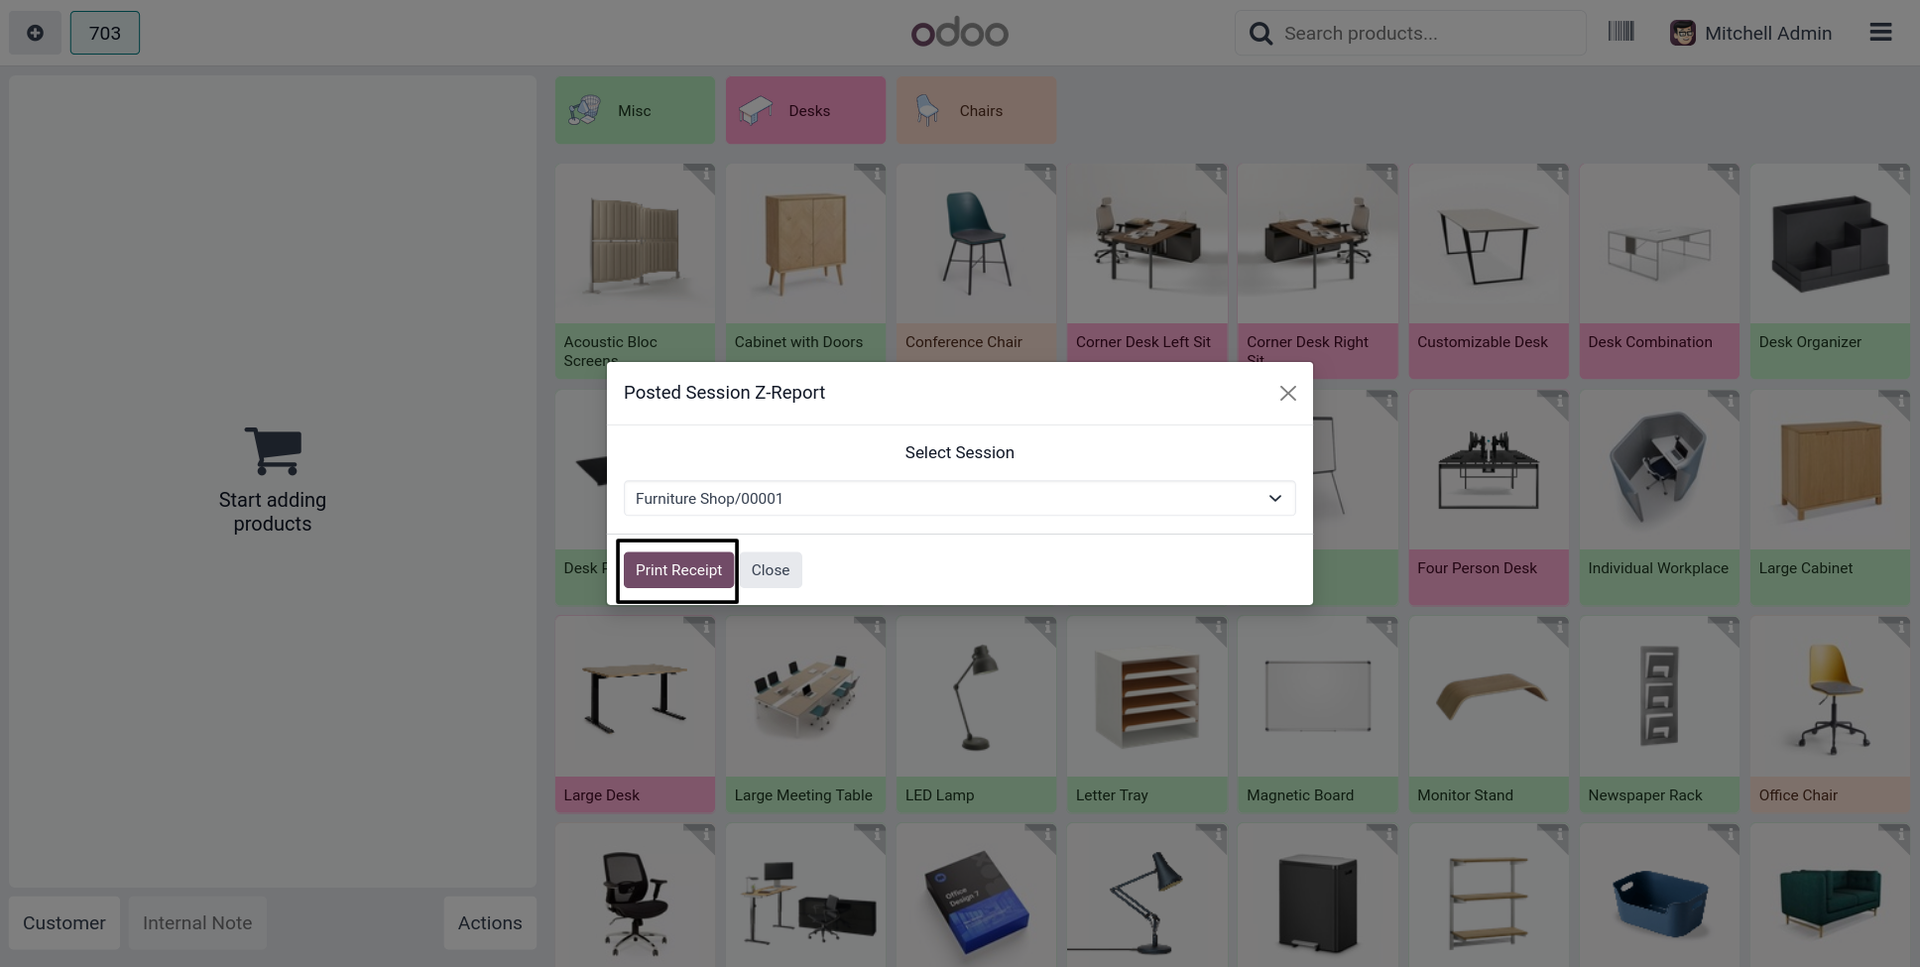
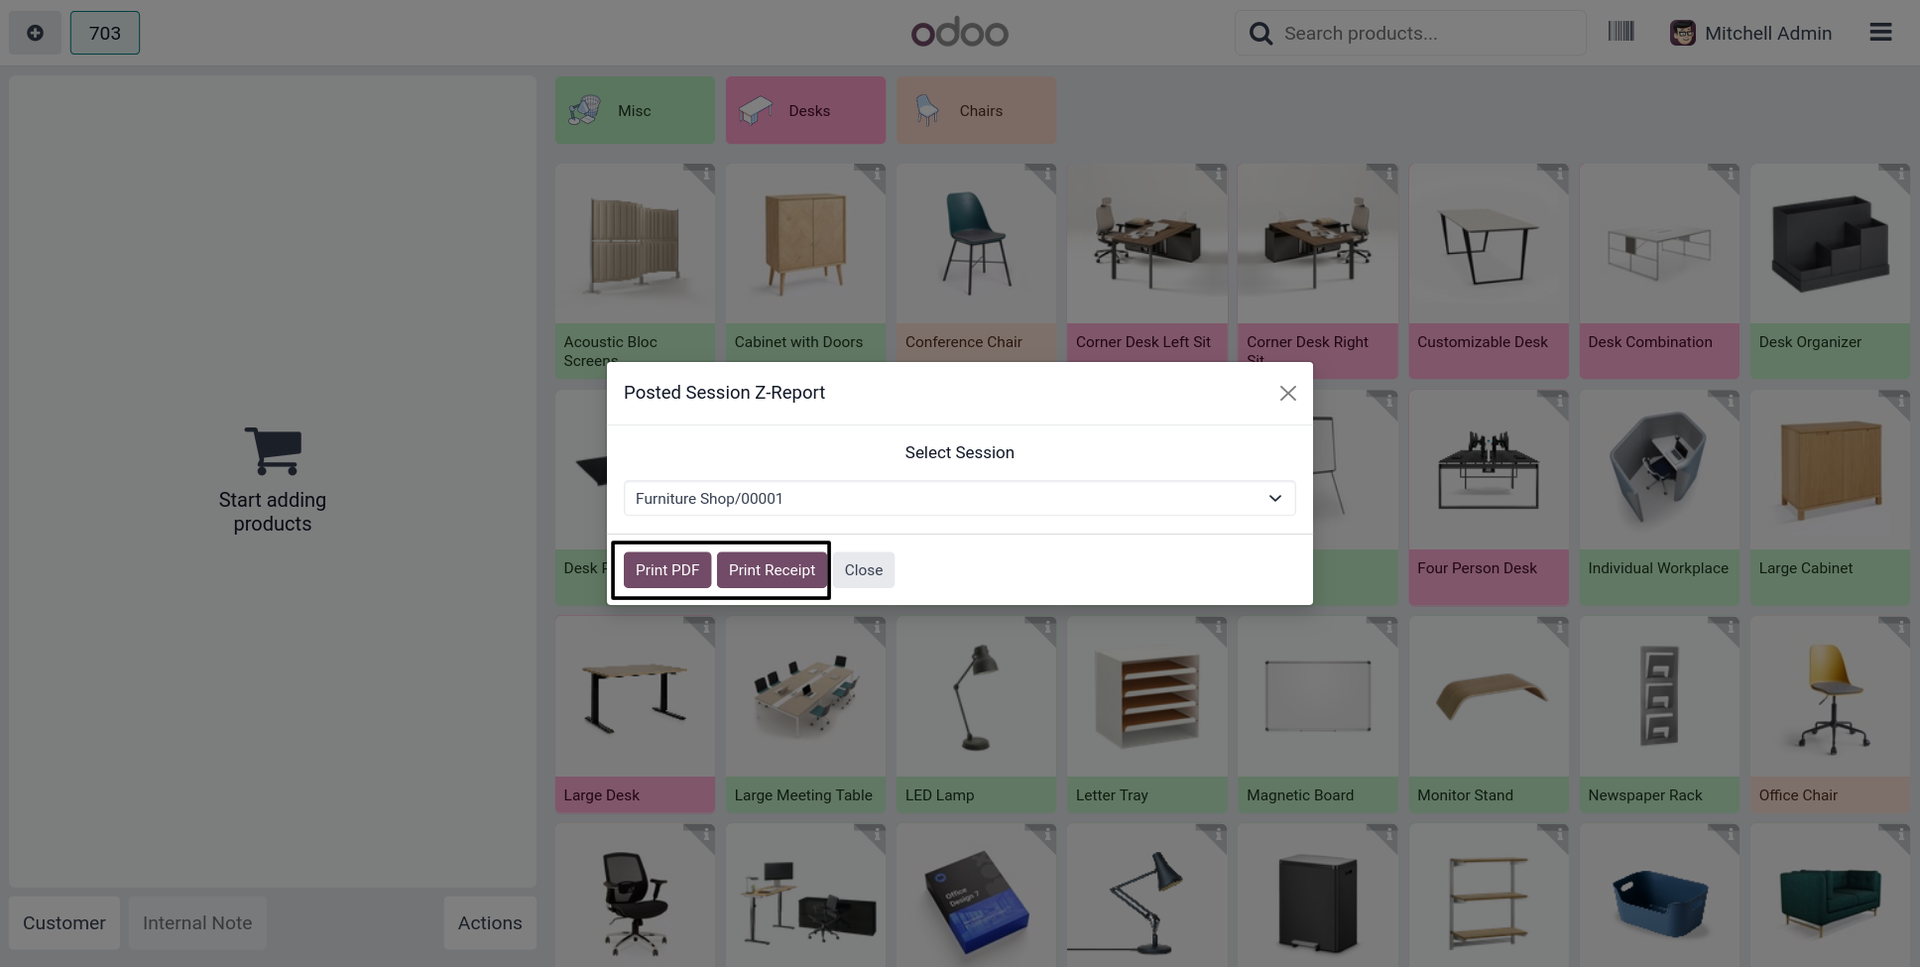
12. Open the 'Actions' wizard on the POS screen, and the "Posted Session Z-Report" button will now be visible.

13. Click the button to open the popup wizard, select the desired posted session from the dropdown, and click "Generate PDF".

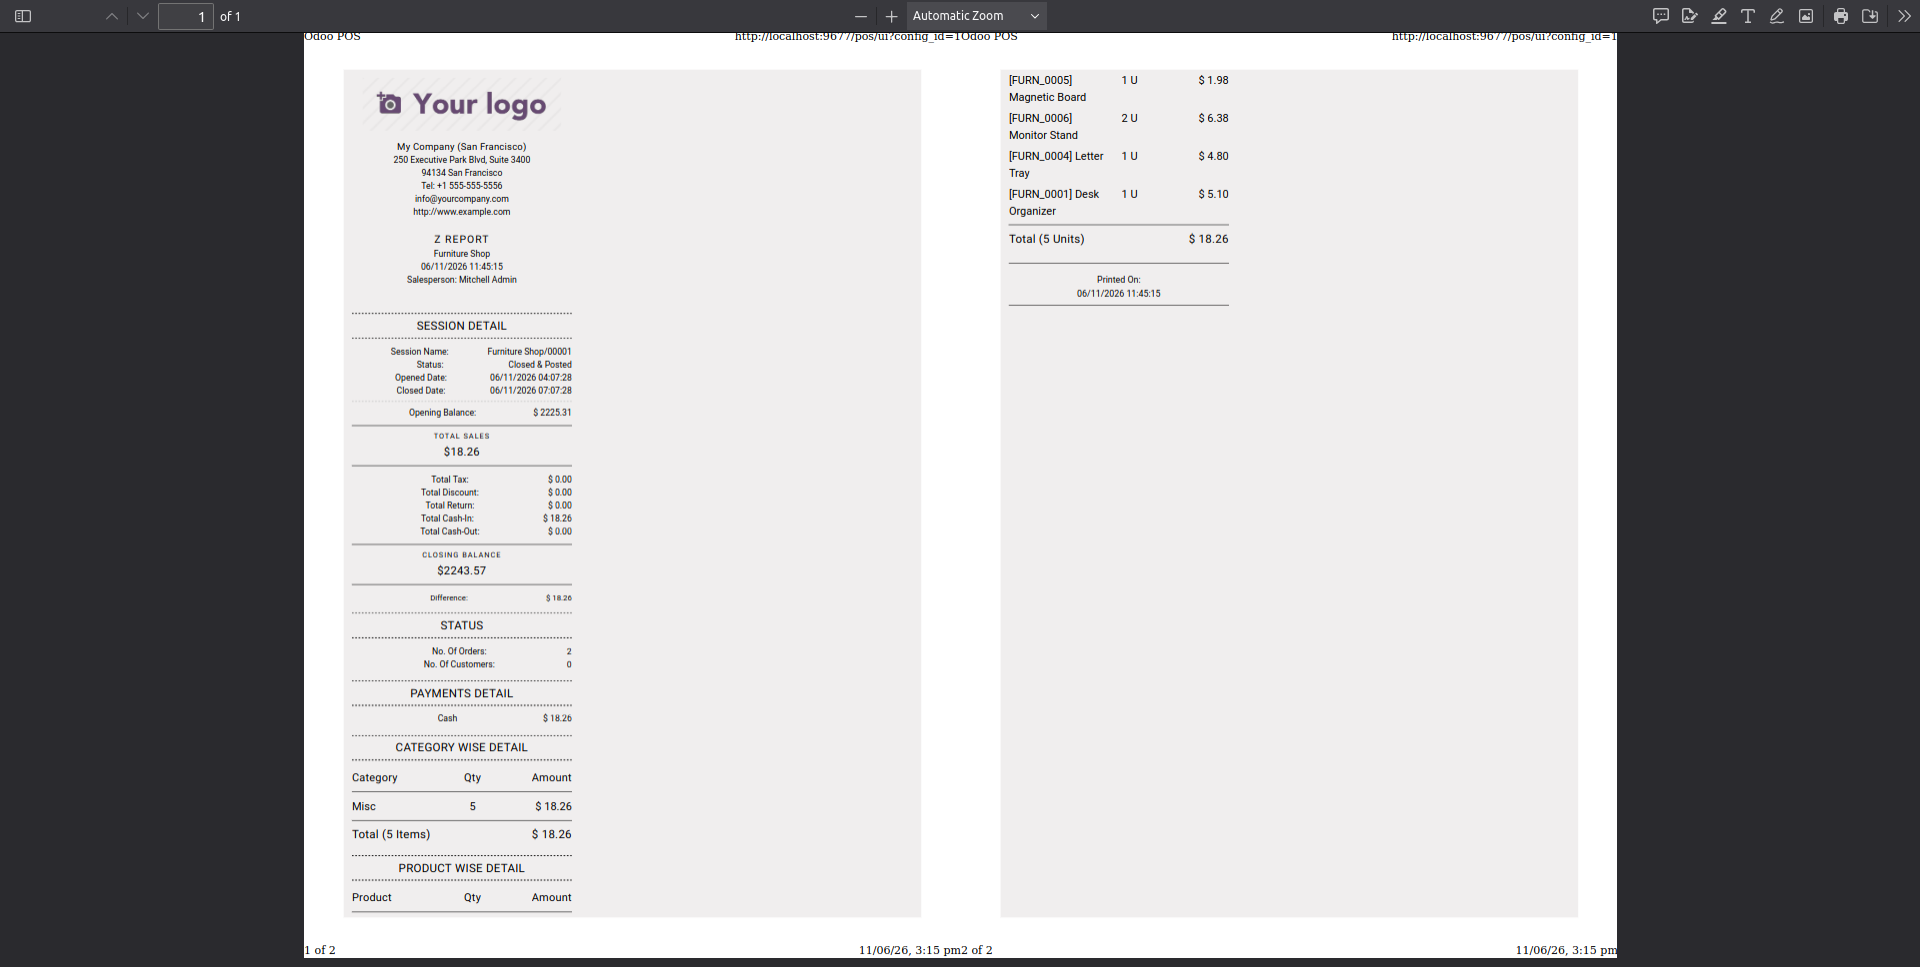
14. The system will successfully generate and download the Z-report for the selected posted session in PDF format.
15. To print the posted session report in receipt format instead, go to POS settings and select "Receipt" under the report type.
16. Open the posted session popup wizard again from the POS screen, select the session, and click the "Generate Receipt" button.
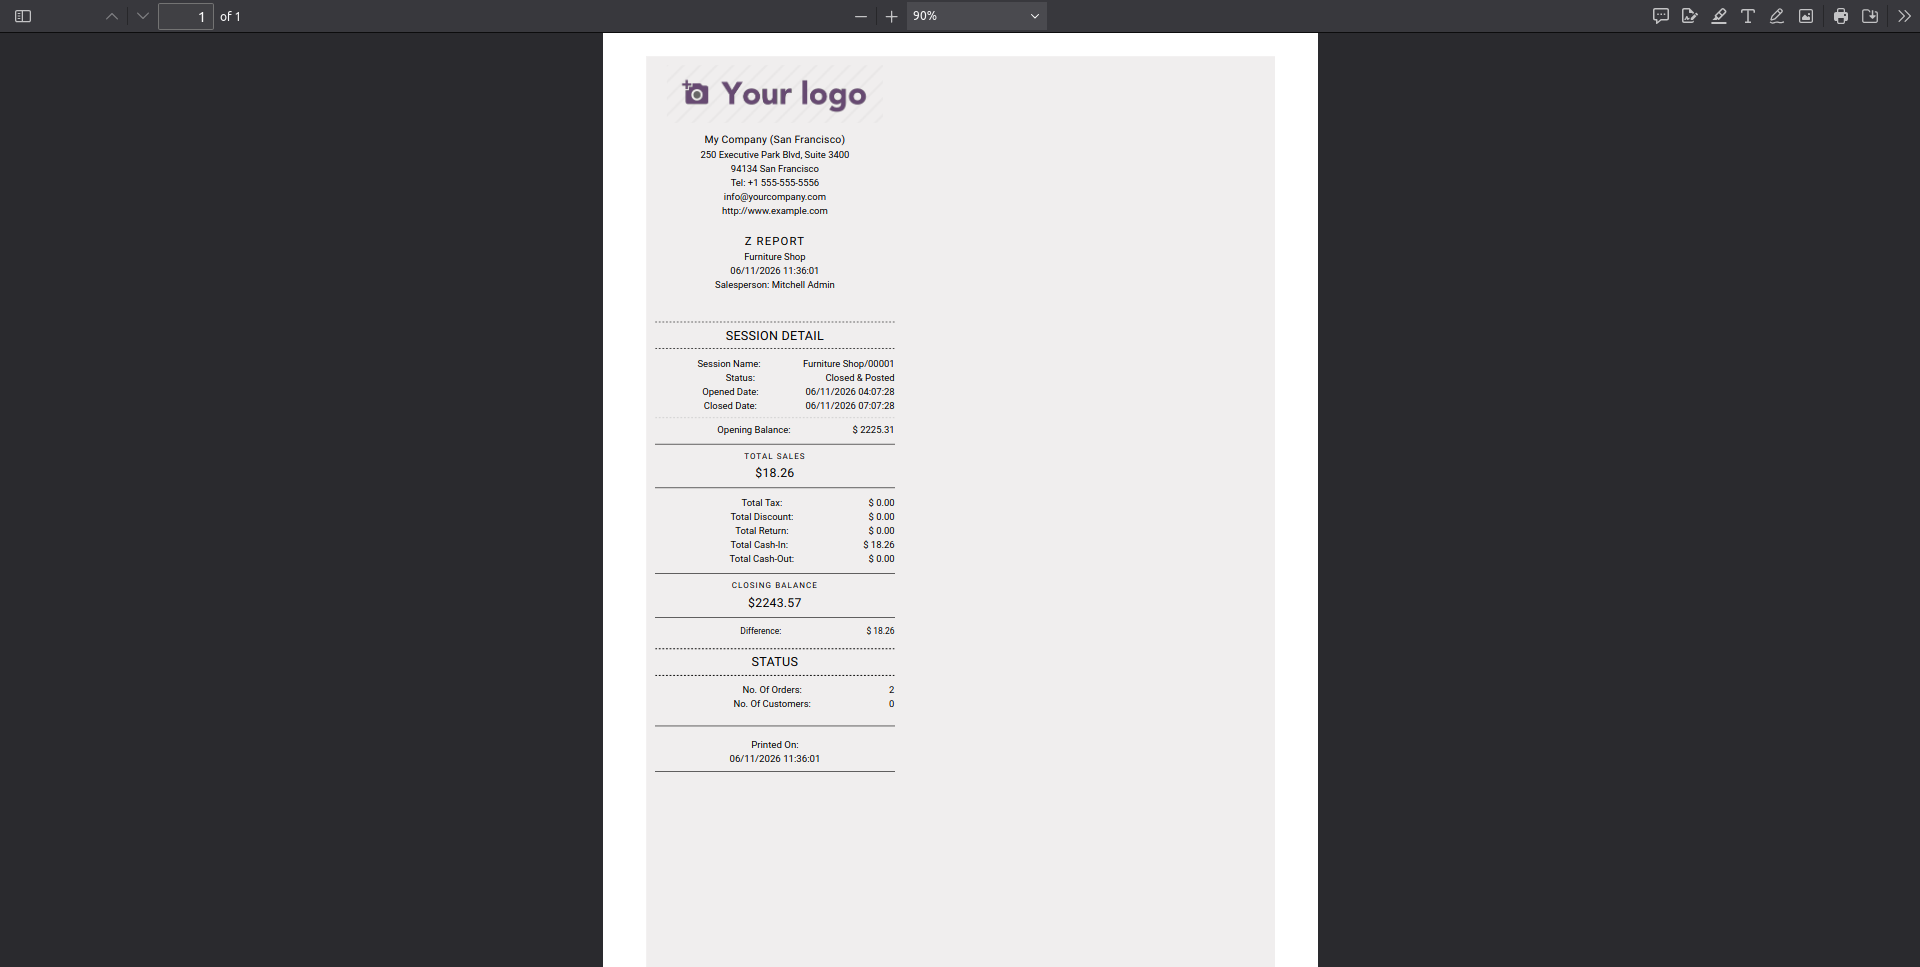
17. The posted session Z-report will instantly be generated and displayed in the receipt format on your POS screen.
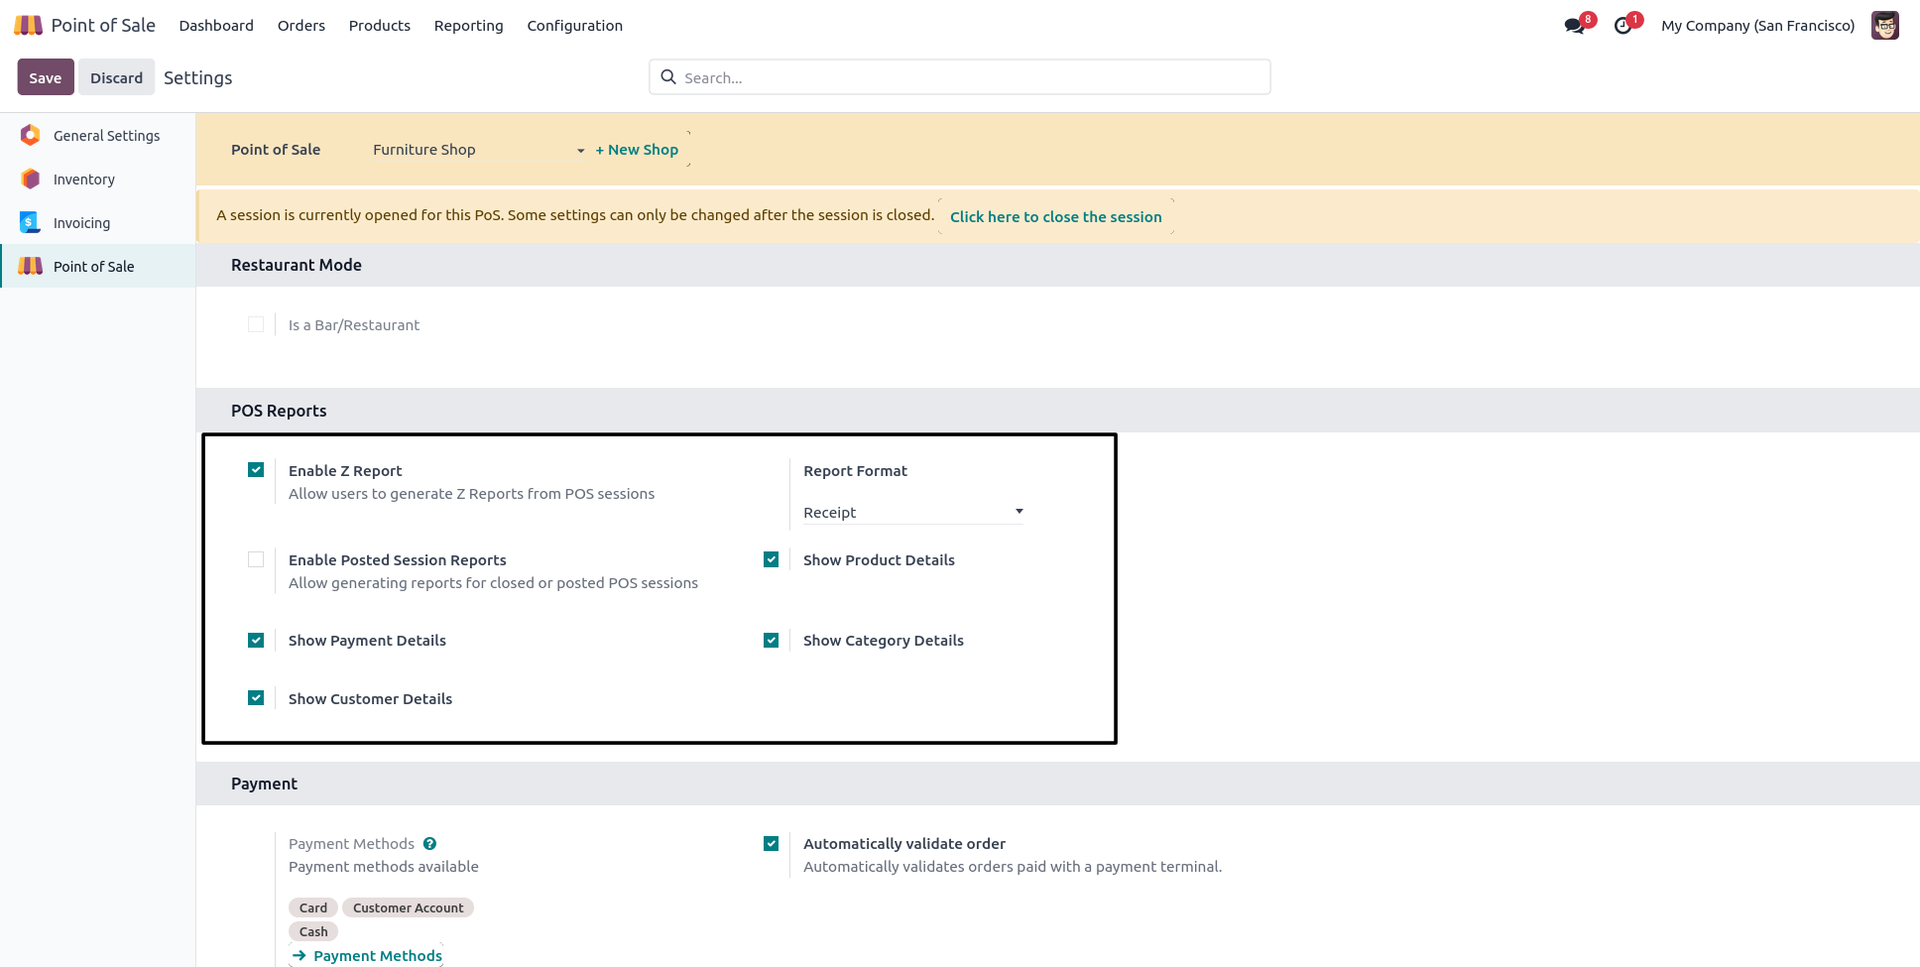
18. Go to POS settings, tick all detail options (Category, Product, Customer, Payment), and set the report type to "Receipt".
19. The generated receipt will now display a comprehensive breakdown including all the selected detailed data.
20. If you want to print all layout details in both formats simultaneously, go to POS settings and select "Both" under the Z-Report Type.
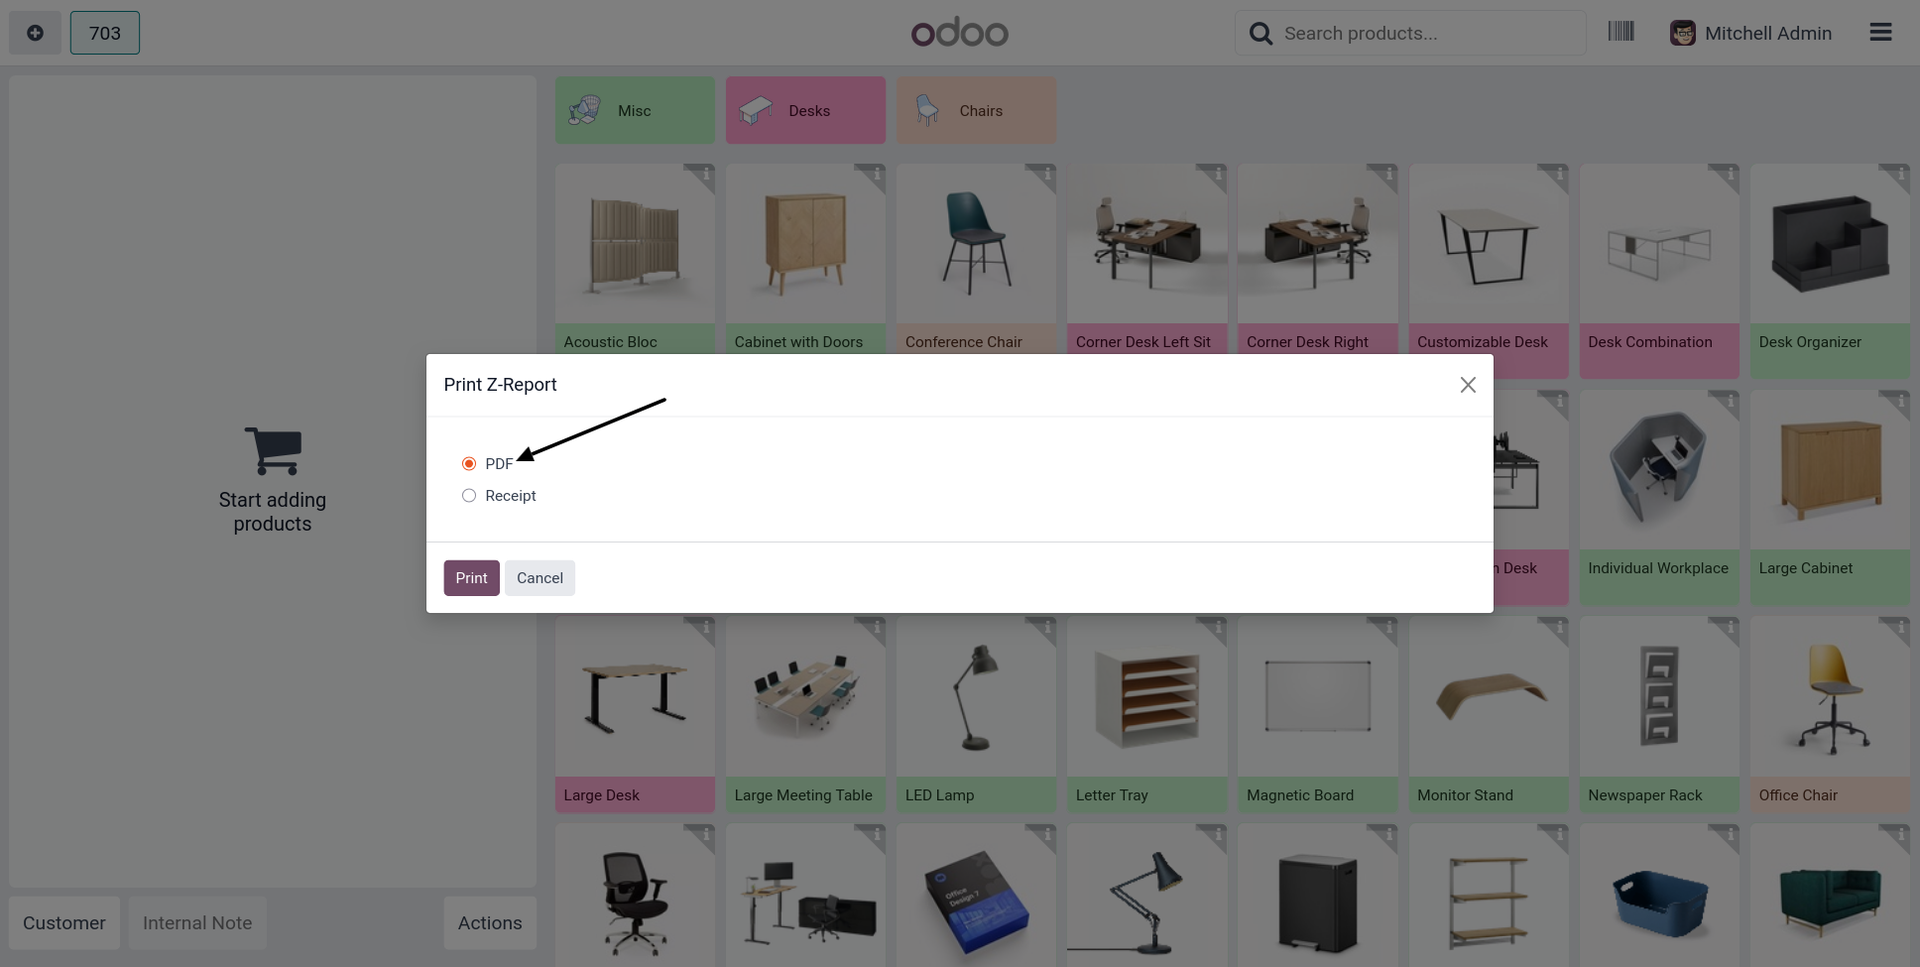
21. Clicking the 'Z-Report' button from the wizard will show a popup allowing you to select radio buttons for either 'Receipt' or 'PDF' generation.
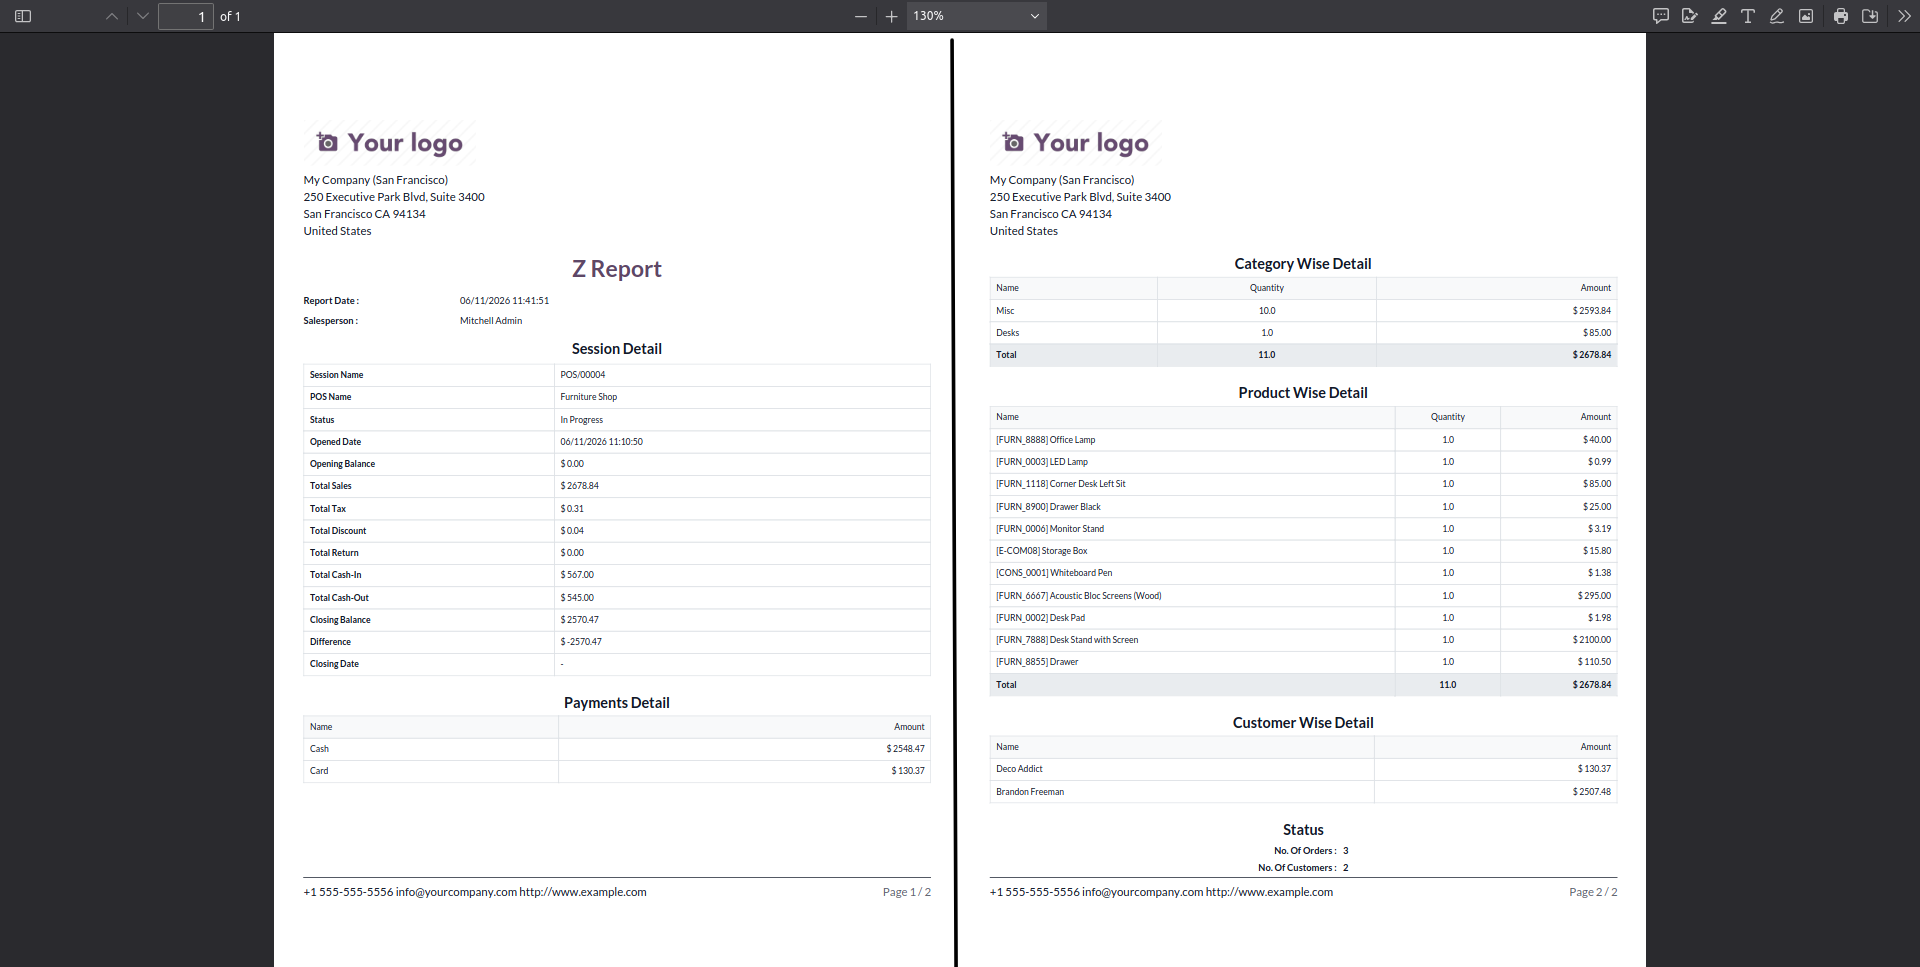
22. The system will successfully generate and download the Z-Report in a comprehensive PDF format based on your selection.
23. Clicking 'Posted Session Z-Report' will give you a popup to choose a specific closed session with options to click "Generate PDF" or "Generate Receipt".
24. The posted session report will be instantly generated and displayed in receipt format on your screen after clicking the 'Generate Receipt' button.
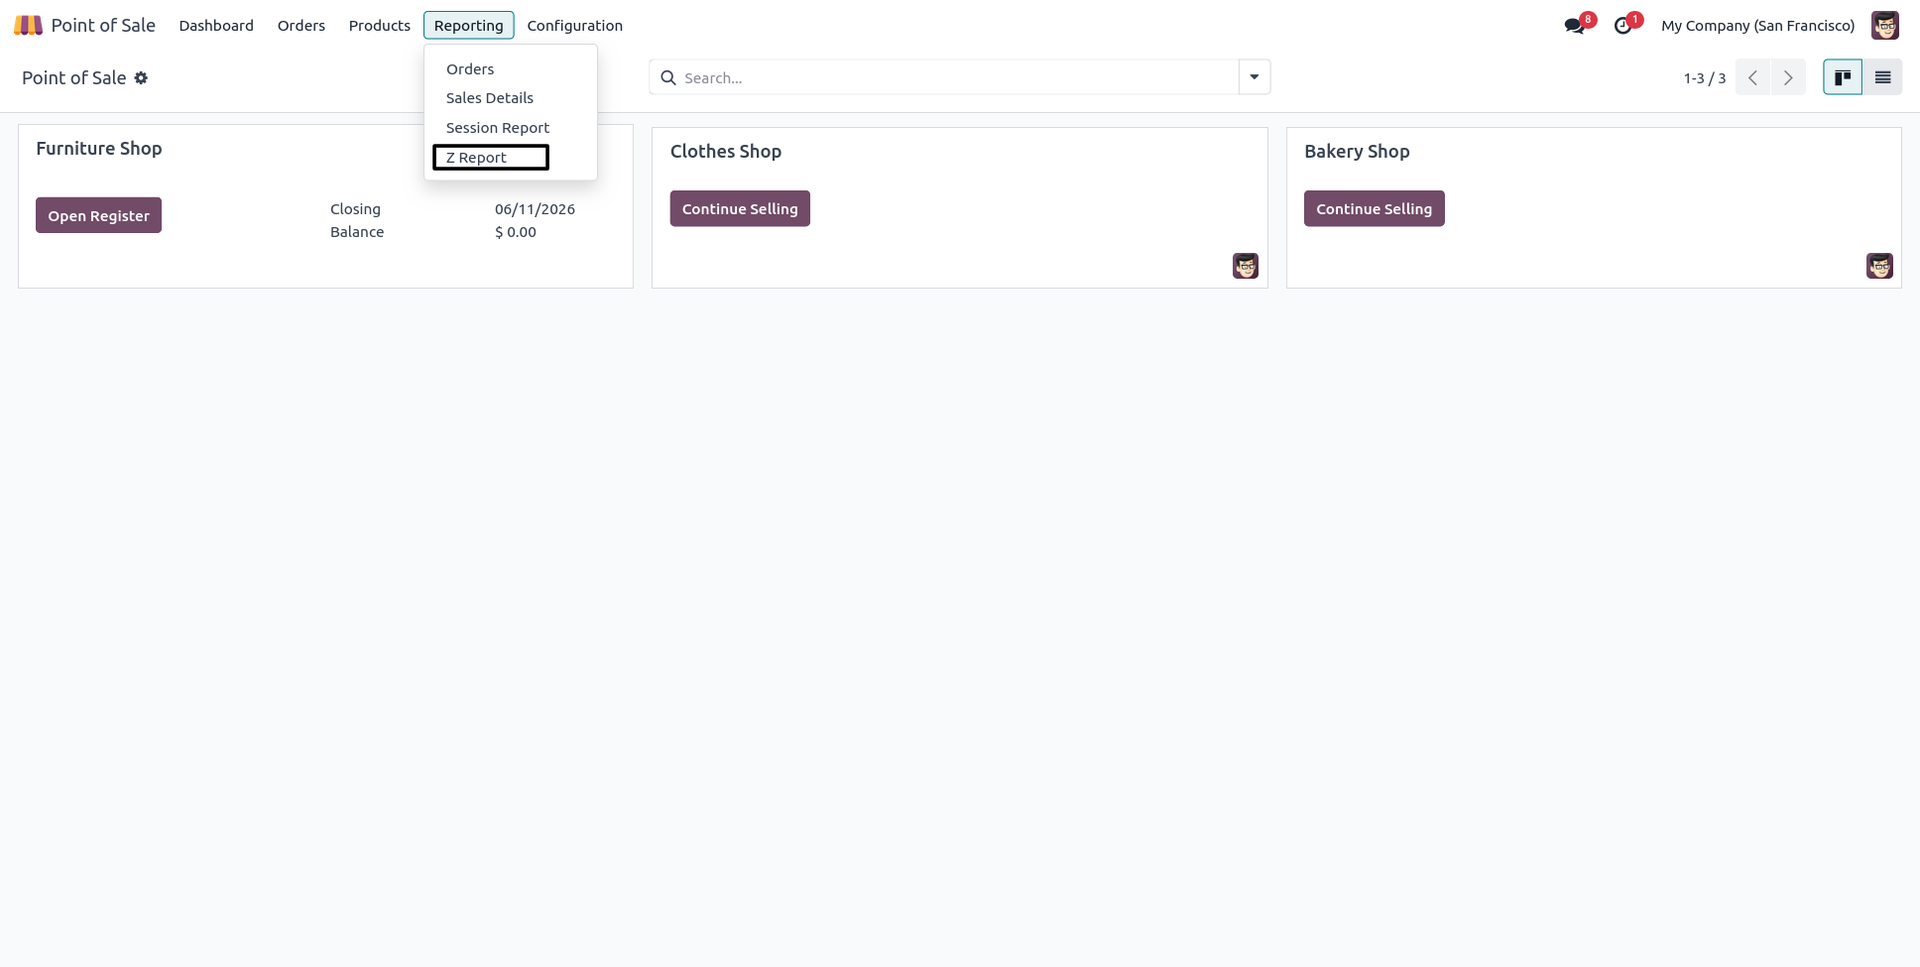
25. You can also find and easily access the dedicated 'Z-Report' sub-menu located directly under the 'Reporting' menu in the POS application.
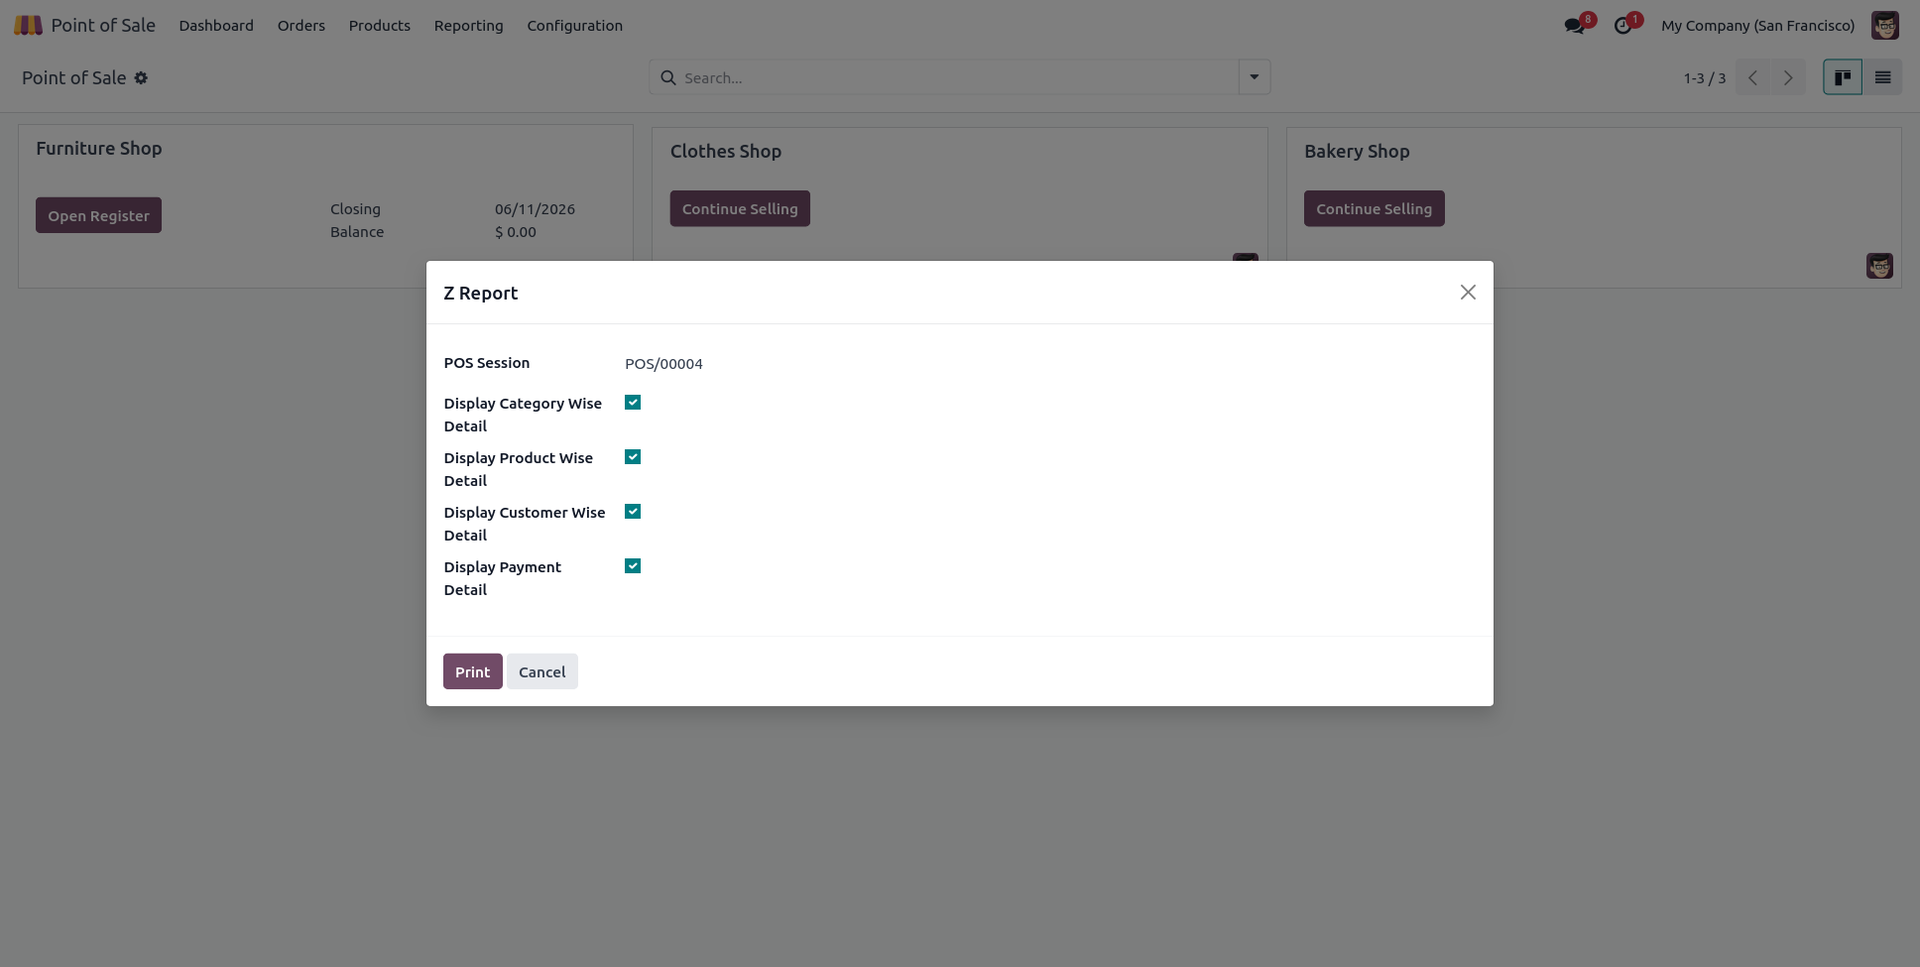
26. Clicking the menu will open a wizard where you can select multiple sessions simultaneously and tick specific layout details to include in the report.
27. The aggregated Z-report for the multiple selected sessions will be generated and printed seamlessly in a detailed PDF format.
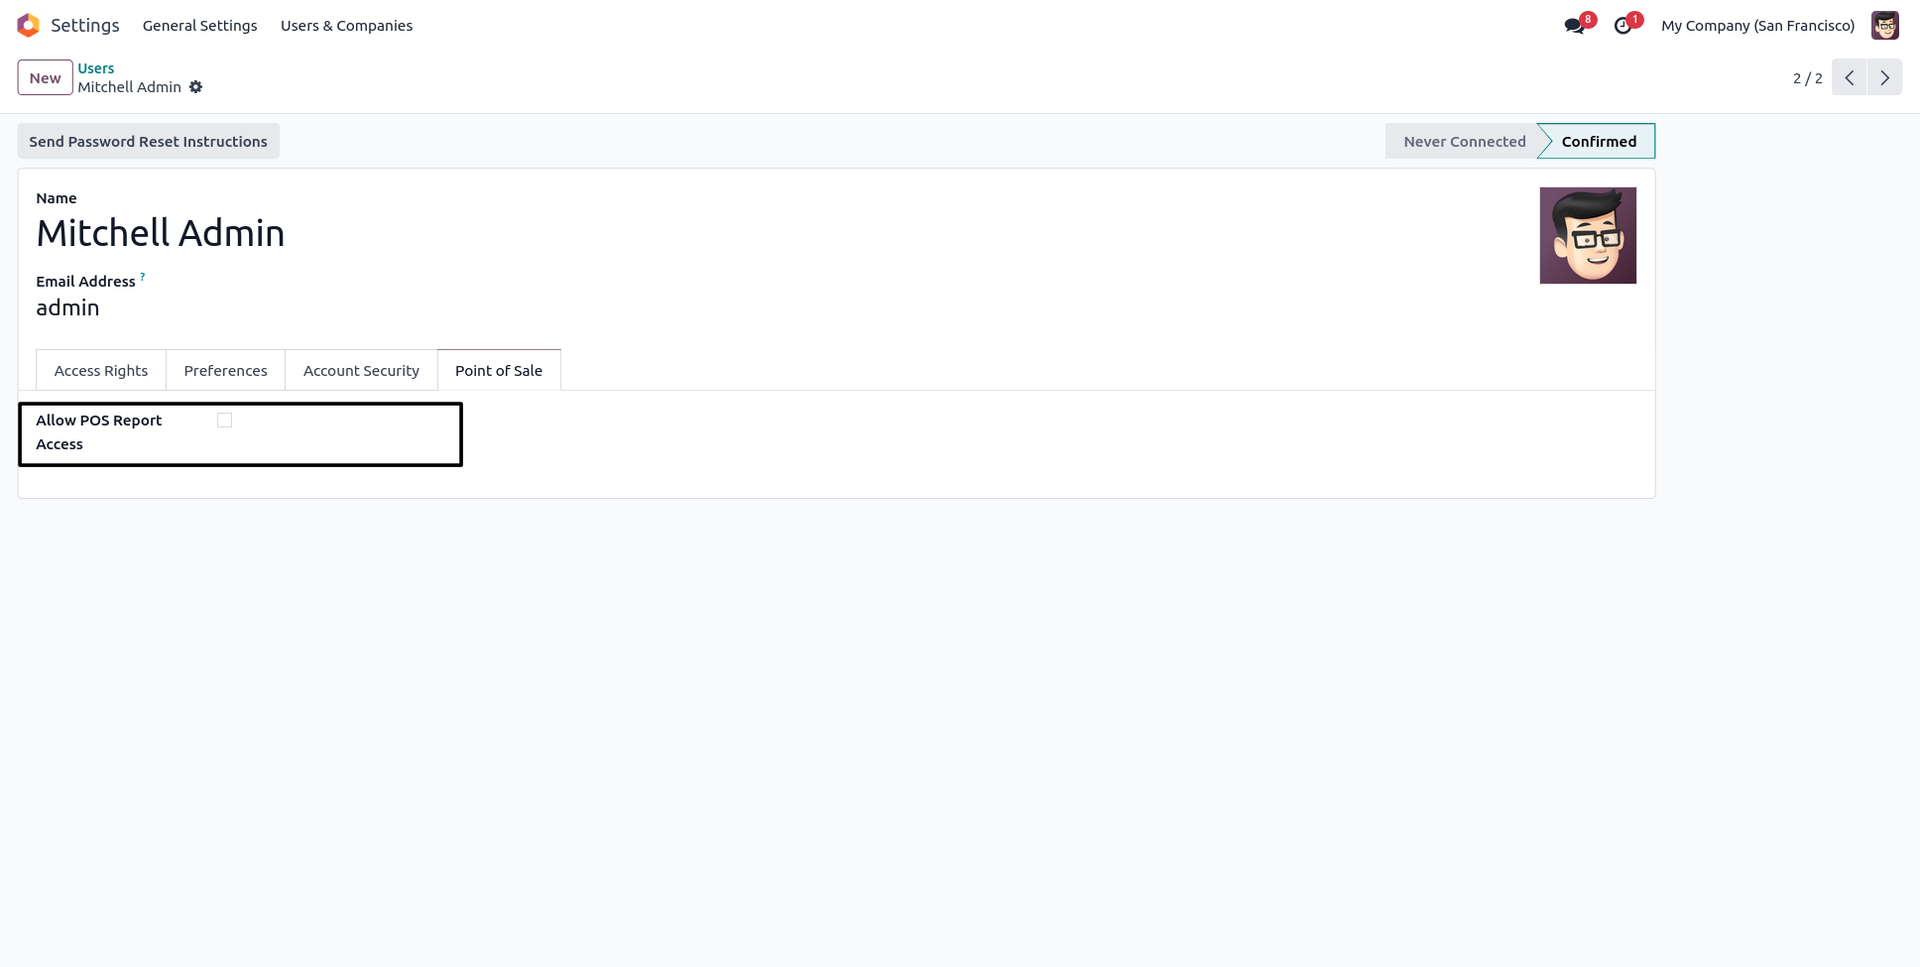
28. If you untick the 'Allow to Generate Z Report' checkbox inside specific user access settings, the permission will be revoked.
29. Consequently, the 'Z-Report' and 'Posted Session Z-Report' action buttons will no longer be available in the 'Actions' wizard on the POS screen for that user.

30. Additionally, the 'Z-Report' reporting menu option in the backend will also be completely hidden for users without the configured permission.
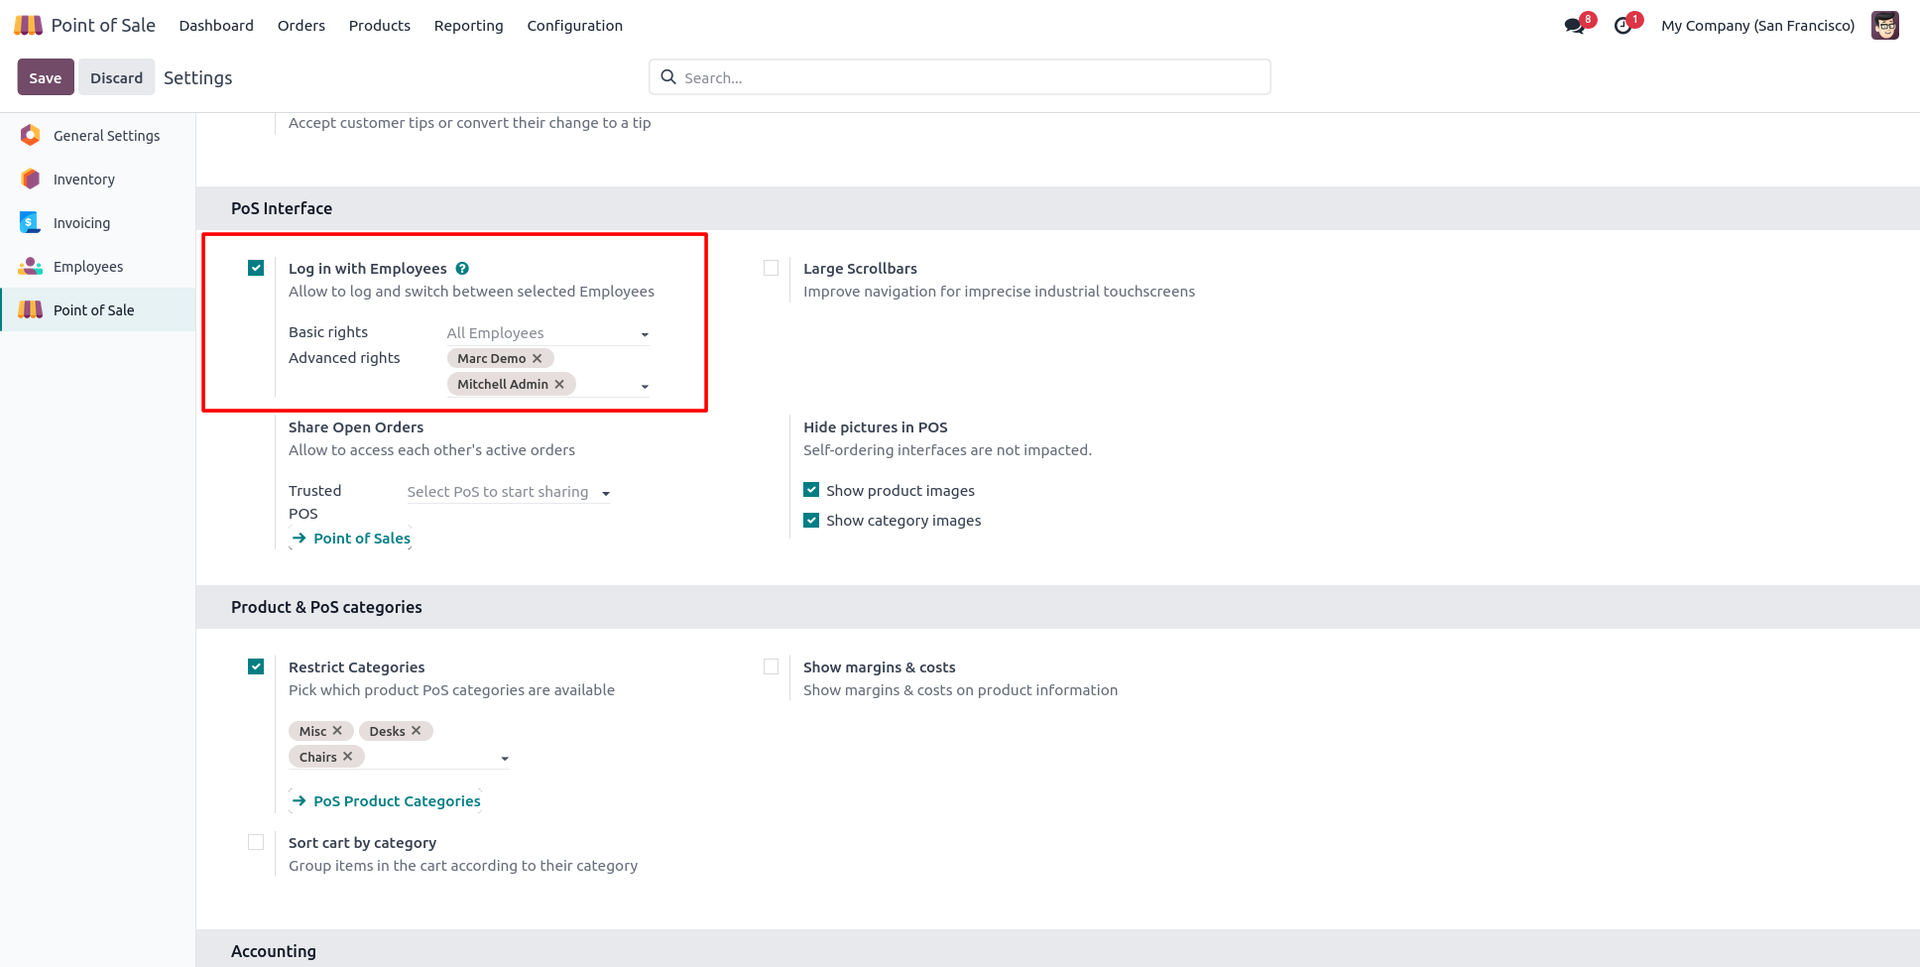
31. Go to POS settings and tick 'Login with Employees' to enable employee-specific session access and configurations.
32. Open the selected employee's profile and tick the 'Allow to Generate Z-Report' checkbox to grant them reporting access.
33. When logging into the POS session as that authorized employee, both the 'Z-Report' and 'Posted Session Z-Report' buttons will be visible in the actions wizard.
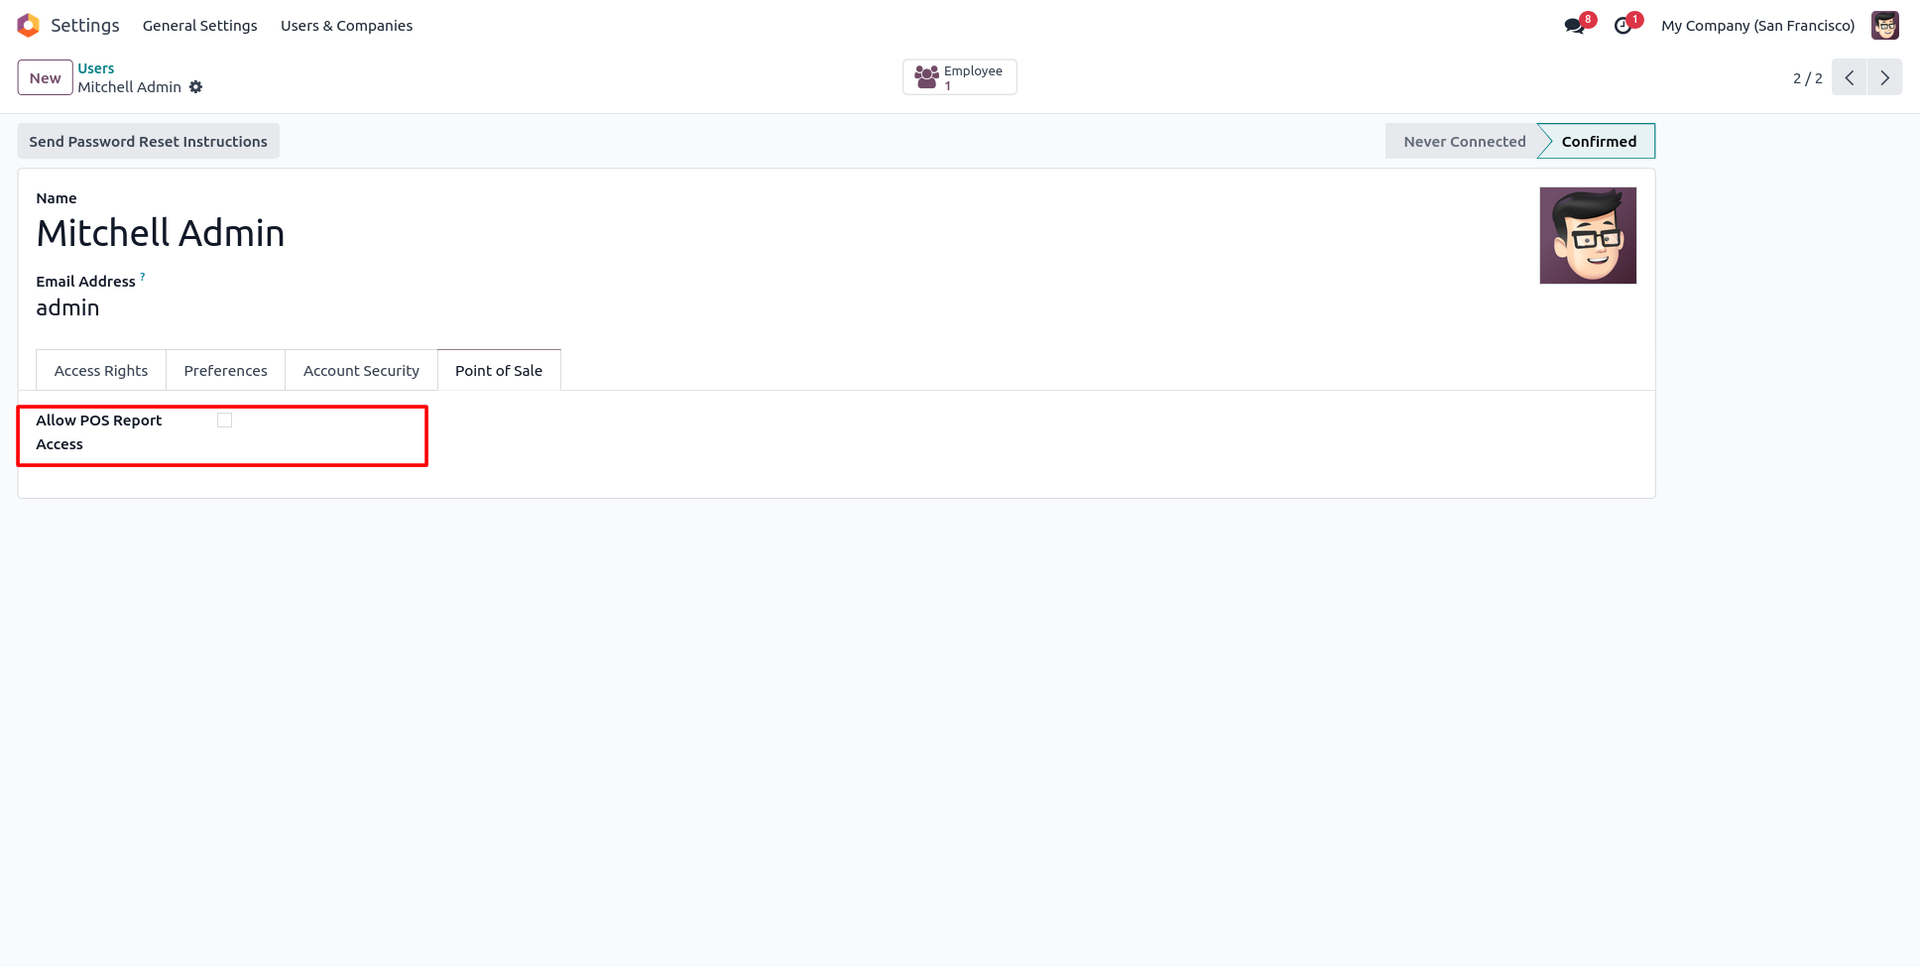
34. Open another employee's profile and untick the 'Allow to Generate Z-Report' checkbox to restrict their reporting permissions.
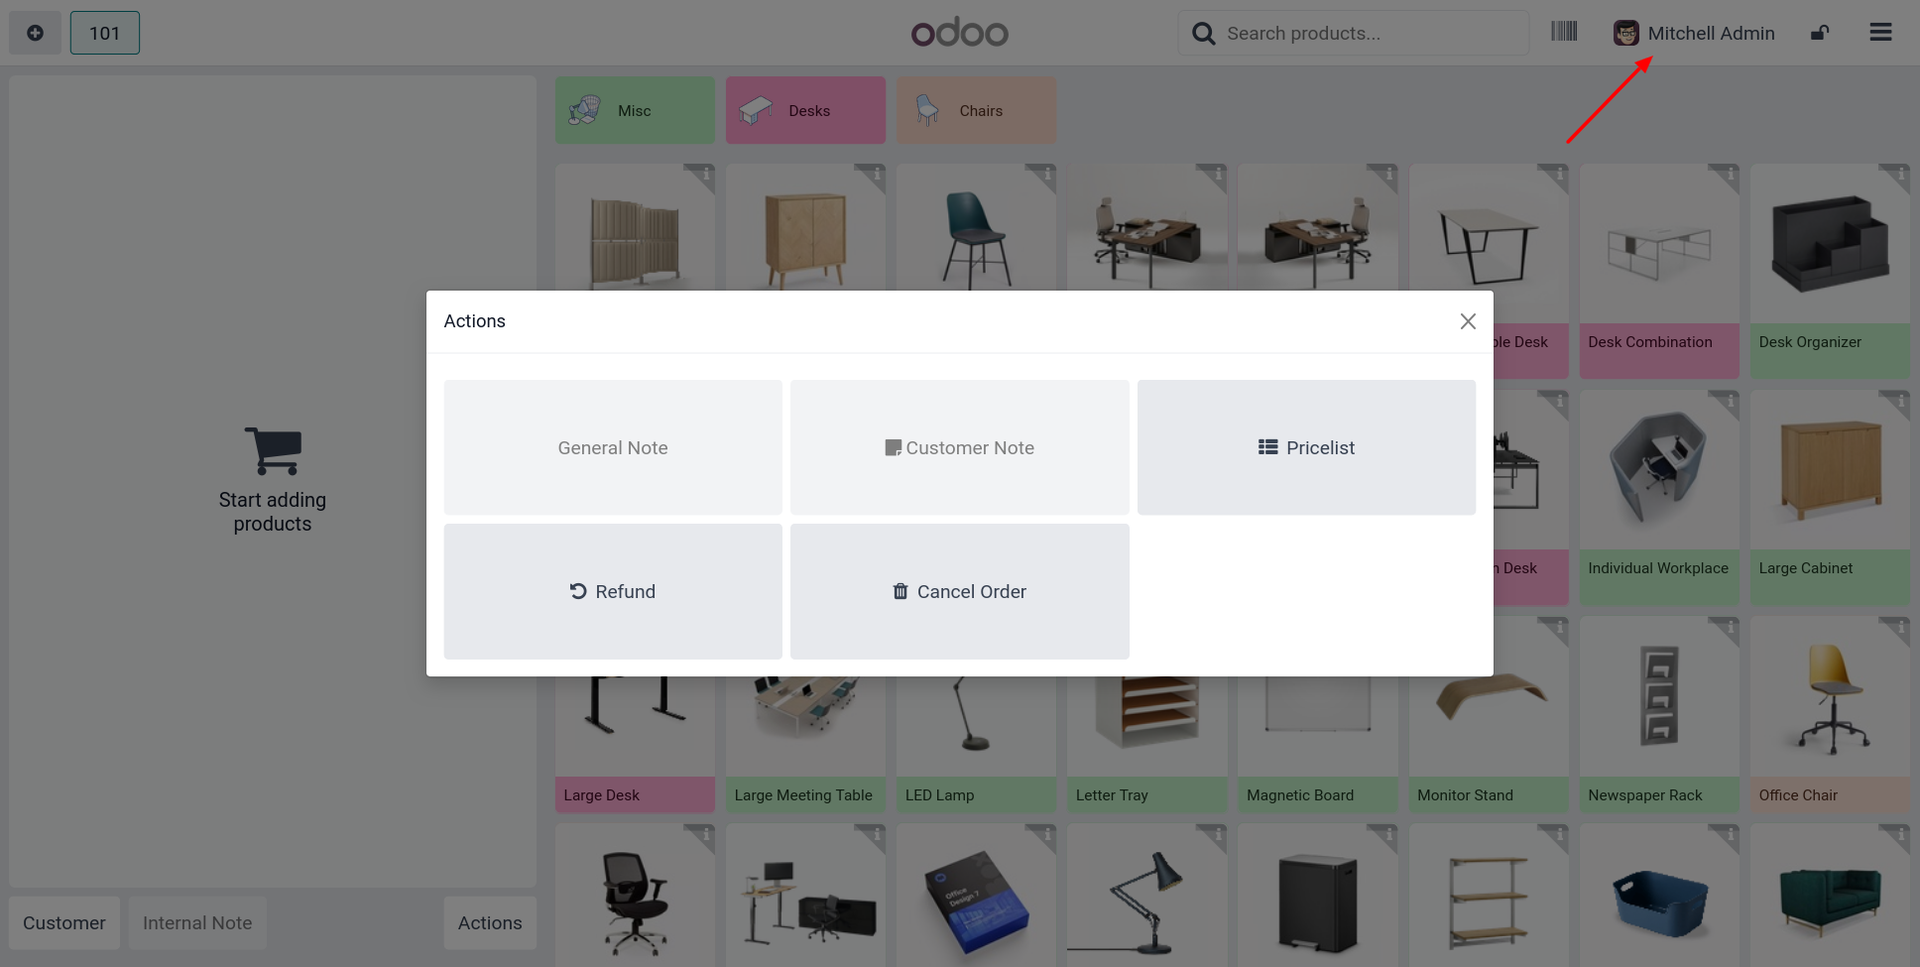
35. When logging into the POS session as that unauthorized employee, the Z-Report action buttons will not be shown in their actions wizard.
Our solutions focus on your problems
- Odoo Implementation
- Odoo Customization
- ERP Development and Implementation
- Odoo Ipass Cloud
- AI for Odoo
- Odoo Apps
- Aws Marketplace Products
- Business Engines
Our Pricing includes User Manual, 90 Days Support (Monday-Friday 10am to 7pm IST) and One time Setup
• Works & tested on standard installations of Odoo with no third party apps,
• Free support only for odoo installations with no third party apps,
• Paid support available for Odoo installations with third party apps.
Prefortune is a Odoo Official Partner, Odoo Development company. Our philosophy is to use Open Source tools and technologies to provide cost effective and green solutions for our customers.
Prefortune Technologies LLP is working on web development, Mobile development, and Odoo ERP.
If you need any help or want more additional features, you may contact us through:
Alternative Products
These other products might interest you
Specifications
| Version | 14.0, 15.0, 16.0, 17.0, 18.0, 19.0 |